Craving Olive Garden flavor at home. Try this easy homemade breadsticks recipe with garlic butter and parmesan for a quick weeknight dinner favorite. Save for later
Olive Garden Breadsticks Recipe
Introduction
Imagine sinking your teeth into a warm, crispy, and flavorful breadstick, reminiscent of the beloved Olive Garden experience, but from the comfort of your own home. This Olive Garden Breadsticks Recipe is designed to be easy, accessible, and incredibly delicious, using everyday ingredients that you might already have in your pantry. The beauty of this recipe lies in its simplicity and the freedom to get creative with the flavors and toppings, making it perfect for family gatherings, parties, or a cozy night in. Whether you’re a seasoned baker or a beginner in the kitchen, this recipe is sure to impress with its ease of preparation and the impressive results it yields with minimal effort.
Why This Works
- Flavor balance and ingredient accessibility: The combination of herbs, spices, and the subtle sweetness of the bread creates a well-rounded flavor profile that is both comforting and exciting. The ingredients are easily found in most supermarkets, making this recipe highly accessible.
- Ease of preparation: The steps involved in making these breadsticks are straightforward and simple, requiring minimal specialized equipment or cooking techniques. This makes the recipe perfect for those who are new to baking or looking for a quick and easy snack.
- Impressive results with minimal effort: Despite the simplicity of the recipe, the end result is nothing short of impressive. The breadsticks emerge from the oven golden, fragrant, and irresistibly appetizing, sure to impress both family and friends.
Key Ingredients
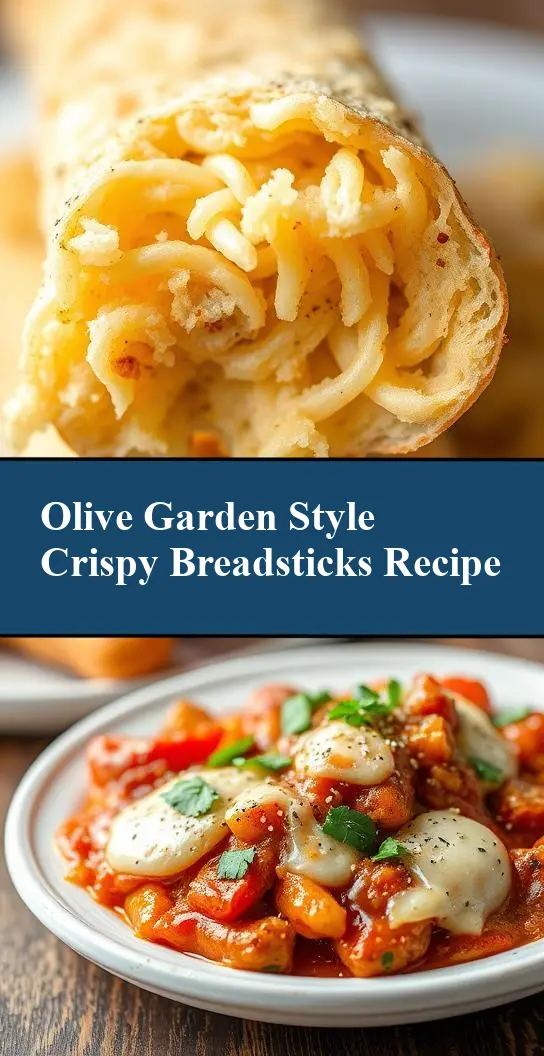
The main ingredients in this Olive Garden Breadsticks Recipe include warm water, active dry yeast, sugar, all-purpose flour, salt, olive oil, and your choice of seasonings or toppings such as garlic powder, Italian seasoning, and grated Parmesan cheese. Practical substitutions can be made based on dietary needs or preferences, such as using gluten-free flour for those with gluten intolerance or vegan cheese alternatives for a vegan version. The yeast is crucial for the rise of the bread, while the olive oil and seasonings contribute to the flavor and aroma. The Parmesan cheese adds a salty, nutty flavor that complements the herbs and spices beautifully.
Instructions
- Step 1: Begin by activating the yeast in warm water with a teaspoon of sugar. Let it sit for a few minutes until it becomes frothy, indicating that the yeast is active and ready to use. Then, combine the flour, salt, and any desired dry seasonings in a large mixing bowl.
- Step 2: Add the olive oil, yeast mixture, and any additional wet ingredients to the dry ingredients. Mix until a dough forms. Knead the dough for about 10 minutes until it becomes smooth and elastic. Place the dough in a greased bowl, cover it, and let it rise in a warm place until it has doubled in size.
- Step 3: Preheat your oven to 400°F (200°C). Once the dough has risen, punch it down and divide it into equal pieces, depending on how thick or thin you like your breadsticks. Roll each piece into a long, thin rope. Place the breadsticks on a baking sheet lined with parchment paper, leaving some space between each breadstick to allow for even cooking. Brush the tops with olive oil and sprinkle with your choice of seasonings and cheese.
- Step 4: Bake the breadsticks in the preheated oven for about 12-15 minutes, or until they are golden brown. Remove them from the oven and let them cool for a few minutes on a wire rack. Serve warm and enjoy!
Handy Tips
- For an extra crispy crust, try baking the breadsticks for an additional 2-3 minutes. Keep an eye on them to prevent burning. Also, consider using a pizza stone in the oven to enhance crispiness.
- Experiment with different seasonings and toppings to give your breadsticks a unique flavor. Some ideas include dried herbs like thyme or oregano, spicy red pepper flakes, or a blend of grated cheeses.
- Avoid overworking the dough, as this can lead to tough breadsticks. Mix the ingredients just until they come together in a shaggy mass, then let the kneading process develop the gluten for a better texture.
Heat Control
The ideal temperature for baking the breadsticks is 400°F (200°C), and the timing can vary depending on the thickness of the breadsticks and your personal preference for crispiness versus softness. A good sign of doneness is when the breadsticks are golden brown and sound hollow when tapped on the bottom. If you prefer a softer breadstick, bake for 10-12 minutes. For a crisper breadstick, bake for 15-18 minutes.
Crunch Factor
To achieve the perfect crunch, it’s essential to not overbake the breadsticks. They should be golden and firm to the touch but still yield to pressure. Brushing the tops with olive oil before baking also helps to create a crispy exterior. For an extra crunchy breadstick, you can try broiling them for a minute or until they reach your desired level of crispiness. Keep a close eye to prevent burning.
Pro Kitchen Tricks
- For easier cleanup, lightly flour your work surface before kneading the dough. This prevents the dough from sticking and makes the cleanup process much simpler.
- Consider making the dough ahead of time and letting it rise in the refrigerator overnight. This allows for a more leisurely pace in the morning and can also enhance the flavor of the breadsticks.
- To ensure that your breadsticks are evenly baked, rotate the baking sheet halfway through the baking time. This step is crucial for achieving uniform color and texture.
Storage Tips
- Leftover breadsticks can be stored in an airtight container at room temperature for up to 2 days. For longer storage, consider freezing them. Simply place the cooled breadsticks in a freezer-safe bag or container and store in the freezer for up to 2 months.
- To reheat frozen breadsticks, bake them in a preheated oven at 350°F (175°C) for about 5-7 minutes, or until warmed through. You can also reheat them in the microwave, but be cautious of uneven heating and potential sogginess.
- The shelf life of breadsticks depends on how they are stored. Freshly baked breadsticks are best consumed within a day for optimal flavor and texture. Frozen breadsticks can be stored for several months, but it’s best to use them within 2 months for the best flavor.
Gift Packaging Ideas
If you’re considering gifting your homemade breadsticks, there are several creative ways to package them. You can place the cooled breadsticks in decorative jars or bags, tied with a ribbon and accompanied by a dip or spread of your choice. Another idea is to wrap the breadsticks individually in parchment paper or aluminum foil and place them in a gift basket filled with other Italian treats like olives, cheeses, and sauces. Adding a personal touch, such as a handwritten note or a small potted herb, can make the gift even more special and appreciated.
Flavor Variations
- 🌟 Different spices: Experiment with various spice blends like Italian seasoning, garlic and herb, or a spicy mix for a unique flavor profile.
- 🌟 Creative toppings: In addition to Parmesan cheese, consider using other grated cheeses, sesame seeds, poppy seeds, or even dried herbs like thyme or rosemary for added flavor and texture.
- 🌟 Ingredient swaps: For a gluten-free version, use gluten-free flour. For a vegan version, substitute the cheese with a vegan alternative and ensure that the yeast and other ingredients are vegan-friendly.
Troubleshooting
- Texture problems: If your breadsticks turn out too dense, it might be due to overworking the dough. Try to mix and knead the dough just until it comes together. If they are too crispy, they might have been overbaked. Adjust the baking time for softer breadsticks.
- Ingredient replacements: When substituting ingredients, especially in terms of flour or yeast, be aware that the results might vary. Gluten-free flours, for example, can behave differently and might require additional xanthan gum for structure.
- Over/undercooking signs: Overcooked breadsticks will be dark brown and hard, while undercooked ones might be pale and soft. Adjust the baking time based on your oven’s performance and the thickness of the breadsticks.
FAQs
- Can I freeze it? Yes, you can freeze the breadsticks after they have cooled completely. Place them in a freezer-safe bag or container and store for up to 2 months.
- Is it gluten-free? The original recipe uses all-purpose flour, which contains gluten. However, you can make a gluten-free version by substituting the flour with a gluten-free flour blend and ensuring that all other ingredients are gluten-free.
- Can I double the recipe? Yes, you can easily double or triple the recipe if you’re planning to serve a larger crowd. Just keep in mind that you might need to adjust the baking time slightly if you’re making a large batch.
Conclusion
This Olive Garden Breadsticks Recipe is a versatile and delicious addition to any meal or gathering. With its ease of preparation, impressive results, and the freedom to customize with your favorite flavors and toppings, it’s a recipe that you’ll return to again and again. Whether you’re a fan of Olive Garden’s signature breadsticks or just looking for a new snack idea, this recipe is sure to please. Feel free to experiment with different seasonings, cheeses, and ingredients to make it your own, and don’t hesitate to share your creations with friends and family. Happy baking, and buon appetito!