Are you ready for a dessert game changer? This key lime pie cheesecake is an easy and quick homemade treat made with a graham cracker crust and creamy lime filling, perfect for a weeknight dinner or family favorite, save for later and indulge in its tangy goodness.
Key Lime Pie Cheesecake
Introduction
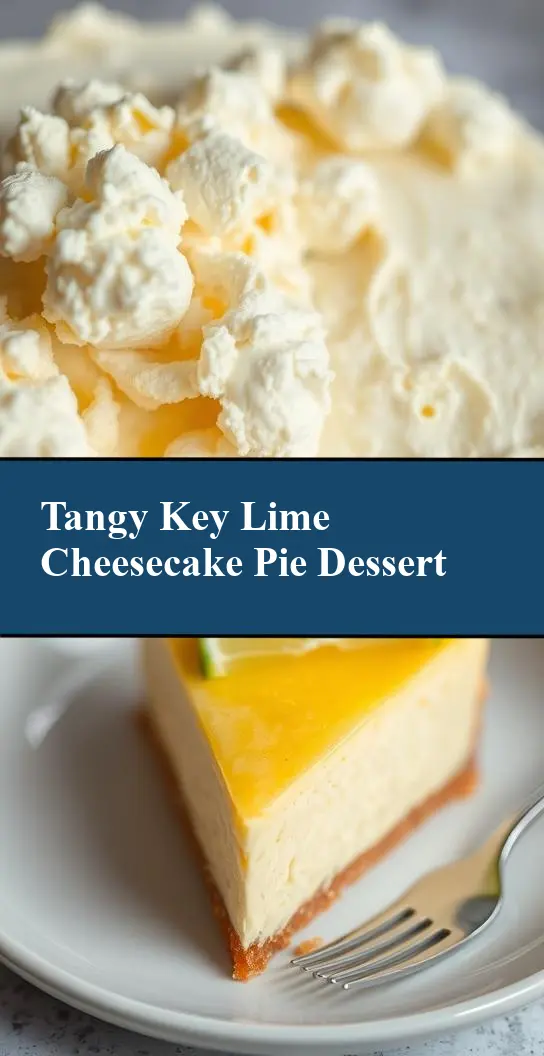
Imagine a dessert that combines the tangy, creamy essence of cheesecake with the bright, zesty flavor of key lime pie. The Key Lime Pie Cheesecake is a masterpiece of culinary creativity, blending two beloved desserts into one show-stopping treat. What’s more, this recipe is remarkably easy to prepare, requiring only everyday ingredients and straightforward instructions. Whether you’re a seasoned baker or a novice in the kitchen, this cheesecake is sure to impress with its balance of flavors and textures, all achieved with minimal fuss. So, let’s dive into the world of Key Lime Pie Cheesecake and discover how to make this stunning dessert.
Why This Works
- Flavor balance and ingredient accessibility: The combination of a graham cracker crust, a creamy cheesecake filling, and the tangy zip of key lime juice creates a perfectly balanced flavor profile. Moreover, the ingredients are easily accessible in most supermarkets, making this dessert feasible for anyone to make.
- Ease of preparation: Despite its impressive appearance and complex flavor profile, the Key Lime Pie Cheesecake is surprisingly easy to prepare. The steps are straightforward, and each component can be made ahead of time, making it a great option for entertaining or special occasions.
- Impressive results with minimal effort: One of the most appealing aspects of this recipe is the significant payoff for relatively little effort. The end result is a cheesecake that looks and tastes like it was made by a professional, sure to impress friends and family with its elegance and deliciousness.
Key Ingredients
The Key Lime Pie Cheesecake relies on several key ingredients to achieve its distinctive flavor and texture. For the crust, you’ll need graham cracker crumbs, sugar, and melted butter. The cheesecake filling is composed of cream cheese, granulated sugar, eggs, key lime juice, and a touch of vanilla extract. For the key lime topping, you’ll need key lime juice, condensed milk, and whipped cream. Practical substitutions can be made for some ingredients, such as using bottled key lime juice if fresh key limes are not available, or substituting the graham cracker crust with a pastry crust for a different texture.
Instructions
- Step 1: Begin by preparing the crust. In a medium bowl, mix together the graham cracker crumbs and sugar. Pour in the melted butter and stir until the crumbs are evenly moistened. Press the mixture into the bottom of a 9-inch springform pan. Bake the crust in a preheated oven at 350°F for about 10 minutes, or until it is lightly browned. Let it cool completely.
- Step 2: Next, prepare the cheesecake filling. In a large mixing bowl, beat the cream cheese until it is smooth. Add the granulated sugar and beat until combined. Beat in the eggs one at a time, followed by the key lime juice and vanilla extract. Pour the filling over the cooled crust.
- Step 3: Bake the cheesecake in a preheated oven at 325°F for about 50-60 minutes, or until the edges are set and the center is just slightly jiggly. Avoid overbaking, as this can cause the cheesecake to dry out. Let the cheesecake cool in the oven with the door ajar for 1 hour, then remove it and let it cool completely on a wire rack.
- Step 4: For the final touches, prepare the key lime topping. Mix the key lime juice with the condensed milk until well combined. Spread this mixture over the cooled cheesecake. Top with whipped cream and a sprinkle of lime zest, if desired. Refrigerate the cheesecake for at least 4 hours before serving to allow the flavors to meld together.
Handy Tips
- To ensure a smooth cheesecake, make sure all ingredients are at room temperature before starting. This includes the cream cheese, eggs, and key lime juice.
- A water bath can help prevent cracking and ensure even cooking. Wrap the springform pan in foil and place it in a larger pan filled with water to about halfway up the sides of the springform pan.
- Don’t overmix the batter, as this can lead to a dense cheesecake. Mix just until the ingredients are combined, then stop mixing.
Heat Control
Heat control is crucial when baking the Key Lime Pie Cheesecake. The ideal temperature for baking the cheesecake is 325°F, which helps to prevent overcooking and promotes even cooking. The cheesecake is done when the edges are set and the center is just slightly jiggly. Avoid overbaking, as this can cause the cheesecake to dry out and crack. If using a water bath, ensure the water does not boil, as this can also cause the cheesecake to cook too quickly.
Crunch Factor
The crunch factor in the Key Lime Pie Cheesecake comes from the graham cracker crust. To achieve a crunchy crust, make sure to bake it until it is lightly browned. This will give it a nice texture contrast to the creamy cheesecake filling. If you prefer a crunchier topping, you can also sprinkle some toasted pecans or lime zest over the whipped cream before serving.
Pro Kitchen Tricks
- For a cleaner release from the springform pan, run a knife around the edges of the cheesecake before refrigerating it. This will help prevent the cheesecake from sticking to the pan.
- To achieve a smooth, even top, use a spatula to smooth the cheesecake batter before baking. This will also help prevent air pockets from forming.
- Consider making the components of the cheesecake ahead of time. The crust can be made a day in advance, and the cheesecake filling can be prepared up to a day before baking. This makes the recipe more manageable and reduces last-minute stress.
Storage Tips
- The Key Lime Pie Cheesecake can be stored in the refrigerator for up to 5 days. Wrap it tightly in plastic wrap or aluminum foil to prevent drying out.
- For longer storage, the cheesecake can be frozen. Wrap it tightly in plastic wrap or aluminum foil and place it in a freezer-safe bag. Frozen cheesecake will keep for up to 2 months. Thaw frozen cheesecake overnight in the refrigerator before serving.
- When reheating, avoid using the microwave, as this can cause the cheesecake to become unevenly heated and potentially dry out. Instead, let it come to room temperature or reheat it gently in a low-temperature oven.
Gift Packaging Ideas
The Key Lime Pie Cheesecake makes a wonderful gift, especially for special occasions or as a thank-you gesture. Consider packaging it in a decorative tin or on a cake stand, wrapped in cellophane or paper to protect it. A ribbon or gift tag with a personal message adds a thoughtful touch. If gifting individual slices, wrap each slice in plastic wrap or aluminum foil and place them in a gift box or bag.
Flavor Variations
- 🌟 Different spices: Add a pinch of salt or a teaspoon of grated ginger to the cheesecake filling for added depth of flavor.
- 🌟 Creative toppings: Instead of whipped cream, top the cheesecake with a layer of caramel sauce, toasted coconut flakes, or a sprinkle of sea salt for a different texture and flavor contrast.
- 🌟 Ingredient swaps: Substitute the key lime juice with lemon or orange juice for a different citrus flavor profile. You can also use different types of milk or cream in the key lime topping for a creamier or lighter texture.
Troubleshooting
- Texture problems: If the cheesecake turns out too dense, it may be due to overmixing the batter. If it’s too dry, it might have been overbaked. Adjust the mixing and baking time accordingly for future attempts.
- Ingredient replacements: If you’re missing an ingredient, consider substitutions. For example, you can use bottled key lime juice if fresh key limes are not available, or substitute the graham cracker crust with a pastry crust for a different texture.
- Over/undercooking signs: Keep an eye on the cheesecake while it’s baking. If the edges start to brown too quickly, cover the top with foil to prevent overbrowning. If the center is still very jiggly after the recommended baking time, bake for a few more minutes and check again.
FAQs
- Can I freeze it? Yes, the Key Lime Pie Cheesecake can be frozen for up to 2 months. Wrap it tightly in plastic wrap or aluminum foil and place it in a freezer-safe bag. Thaw frozen cheesecake overnight in the refrigerator before serving.
- Is it gluten-free? The traditional recipe includes a graham cracker crust, which contains gluten. However, you can make a gluten-free version by substituting the graham cracker crust with a gluten-free alternative, such as a crust made from ground almonds or coconut flakes.
- Can I double the recipe? Yes, you can double the recipe to make a larger cheesecake. Just keep in mind that you’ll need to adjust the baking time accordingly. A larger cheesecake will take longer to bake, so check it frequently to avoid overcooking.
Conclusion
The Key Lime Pie Cheesecake is a true showstopper, combining the best of both worlds in a dessert that’s both familiar and excitingly new. With its ease of preparation, impressive presentation, and delicious flavor, it’s perfect for special occasions or everyday indulgence. Feel free to experiment with the recipe, trying out different flavor variations or substitutions to make it your own. Whether you’re a cheesecake aficionado, a key lime pie enthusiast, or just someone who loves dessert, this recipe is sure to become a favorite. So go ahead, give it a try, and enjoy the delightful fusion of key lime and cheesecake in every creamy, tangy bite.