Looking for a delicious weeknight dinner idea? Try these easy homemade honey butter biscuits made with simple ingredients and a quick baking method, perfect for a family favorite meal, Save for later
Honey Butter Biscuits
Introduction
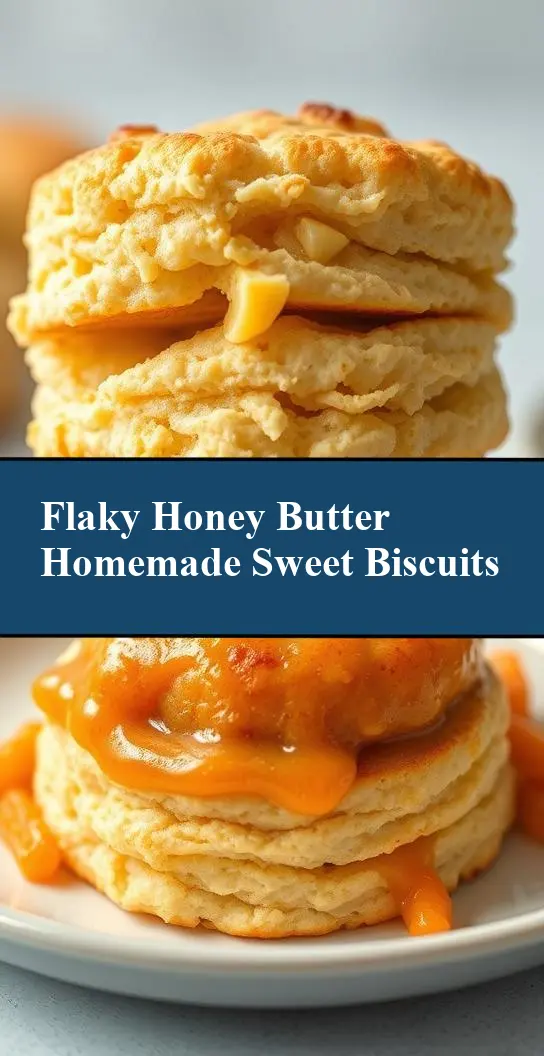
Imagine the warm, comforting taste of freshly baked biscuits, elevated by the richness of honey butter. These Honey Butter Biscuits are a masterclass in simplicity and flavor, using everyday ingredients to create a treat that’s both comforting and elegant. Whether you’re a seasoned baker or just starting out, this recipe is designed to be easy to follow and adaptable to your tastes. With the combination of soft, flaky biscuits and the sweetness of honey butter, you’ll find yourself returning to this recipe time and time again. The best part? It’s incredibly easy to make and requires minimal effort for such an impressive result.
Why This Works
- Flavor balance and ingredient accessibility: The combination of butter, honey, and biscuits creates a perfect balance of flavors that is both comforting and sophisticated. All the ingredients are easily accessible in most supermarkets.
- Ease of preparation: The recipe is straightforward and simple, requiring basic kitchen tools and techniques. This makes it perfect for beginners or for those looking for a quick baking project.
- Impressive results with minimal effort: Despite the simplicity of the recipe, the end result is impressive and perfect for serving at gatherings or as a special treat. The presentation can be easily elevated with a drizzle of extra honey or a sprinkle of fresh herbs.
Key Ingredients
The main ingredients for these Honey Butter Biscuits include all-purpose flour, cold butter, honey, and heavy cream or buttermilk. The quality of the butter and the freshness of the honey can significantly impact the flavor, so using high-quality ingredients is recommended. For those looking for substitutions, almond milk or a non-dairy butter substitute can be used for a dairy-free version, and different types of honey (like clover or manuka) can offer unique flavor profiles.
Instructions
- Step 1: Begin by preheating your oven to 400°F (200°C). Line a baking sheet with parchment paper or a silicone mat. In a large bowl, whisk together the flour, baking powder, salt, and a pinch of sugar. Cut the cold butter into the dry ingredients until the mixture resembles coarse crumbs with some larger pea-sized pieces of butter remaining.
- Step 2: In a small bowl, whisk together the heavy cream or buttermilk and honey until well combined. Pour the wet ingredients into the dry ingredients and stir until the dough comes together in a shaggy mass. Turn the dough out onto a floured surface and gently knead it a few times until it comes together.
- Step 3: Roll the dough out to about 1 inch (2.5 cm) thickness. Use a biscuit cutter or the rim of a glass to cut out the biscuits. You should be able to get about 8-10 biscuits. Gather the scraps, re-roll the dough, and cut out additional biscuits.
- Step 4: Place the biscuits on the prepared baking sheet, leaving about 1 inch (2.5 cm) of space between each biscuit. Brush the tops with a little extra melted butter and bake for 15-20 minutes, or until the biscuits are golden brown. While the biscuits are baking, mix the honey butter by whipping softened butter with honey until smooth and creamy. Once the biscuits are done, let them cool for a few minutes before serving with the honey butter.
Handy Tips
- Make sure to keep your butter and cream cold, as this will help the biscuits to be flaky and tender. If you find that your dough is too sticky, you can add a little more flour. Conversely, if it’s too dry, you can add a bit more cream.
- Avoid overmixing the dough, as this can lead to tough biscuits. The dough should still be slightly shaggy when you stop mixing.
- For an extra crispy top, brush the biscuits with egg wash (beaten egg mixed with a little water) before baking.
Heat Control
The ideal temperature for baking these biscuits is 400°F (200°C). It’s crucial to preheat your oven to ensure that it reaches the correct temperature. Baking time will depend on the size of your biscuits and your oven’s performance, but generally, they should be done in 15-20 minutes. Look for a golden brown color as a sign of doneness. If you prefer a crisper biscuit, you can bake them for an additional 2-3 minutes, but keep an eye on them to prevent overbrowning.
Crunch Factor
The biscuits should have a tender interior and a lightly golden, crispy exterior. To achieve this, make sure not to overbake them. Brushing the tops with butter before baking can also help enhance the crust. For those who prefer a crunchier biscuit, you can try baking them for a few minutes longer or until they reach your desired level of crispiness. However, be cautious not to overdo it, as biscuits can quickly go from perfectly baked to burnt.
Pro Kitchen Tricks
- For a professional touch, consider using a pastry blender to cut the butter into the flour. This tool helps to ensure that the butter is evenly distributed and that the mixture doesn’t become too warm and tough.
- Chilling the dough for about 30 minutes before rolling it out can help the biscuits to retain their shape better and bake up with cleaner edges.
- Using high-quality, European-style butter with a higher fat content can significantly enhance the flavor and texture of the biscuits.
Storage Tips
- Biscuits are best served fresh, but they can be stored in an airtight container at room temperature for up to 2 days. For longer storage, consider freezing them. Biscuits can be frozen for up to 2 months. Simply place them in a single layer in a freezer-safe bag or container and thaw at room temperature or reheat in the oven when needed.
- Reheating can be done in the oven at a lower temperature (about 300°F or 150°C) for 5-7 minutes, or until warmed through. You can also microwave them for a few seconds, but be careful not to overheat.
- The honey butter can be made ahead and stored in the refrigerator for up to a week. Allow it to come to room temperature before serving.
Gift Packaging Ideas
These Honey Butter Biscuits make a wonderful gift, especially when packaged thoughtfully. Consider placing a few biscuits in a decorative tin or jar, accompanied by a small jar of honey butter. You can wrap the jar in a ribbon or twine and add a gift tag with the recipe or a personal message. For a more rustic look, biscuits can be placed in a paper bag, sealed with a piece of twine, and accompanied by a small pot of honey butter and a wooden spoon. This presentation not only looks charming but also invites the recipient to enjoy the biscuits in a cozy, homemade way.
Flavor Variations
- 🌟 Different spices: Adding a pinch of cinnamon, nutmeg, or cardamom to the dough can give the biscuits a unique and aromatic flavor.
- 🌟 Creative toppings: Consider topping your biscuits with fresh herbs like rosemary or thyme, a drizzle of honey, or even a sprinkle of grated cheese for added flavor and texture.
- 🌟 Ingredient swaps: For a savory version, you can reduce the amount of honey in the honey butter and add some chopped fresh herbs or garlic. Alternatively, using different types of flour, like whole wheat or oat flour, can change the texture and flavor profile of the biscuits.
Troubleshooting
- Texture problems: If your biscuits turn out too dense, it might be due to overmixing the dough. Try to mix the ingredients just until they come together, and avoid overworking the dough.
- Ingredient replacements: When substituting ingredients, keep in mind that different types of flour or milk can affect the texture and flavor of the biscuits. Always adjust the liquid content according to the type of flour you’re using.
- Over/undercooking signs: Keep an eye on your biscuits while they’re baking. If they’re not golden brown after the recommended baking time, they might need a few more minutes. Conversely, if they start to brown too quickly, you can cover the baking sheet with foil to prevent overbrowning.
FAQs
- Can I freeze it? Yes, the biscuits can be frozen for up to 2 months. It’s best to freeze them before baking, but you can also freeze baked biscuits and reheat them when needed.
- Is it gluten-free? The recipe as written is not gluten-free because it uses all-purpose flour. However, you can experiment with gluten-free flour blends to make a gluten-free version. Note that gluten-free baking can be more challenging, and you may need to adjust the ratio of flours and add xanthan gum to help with texture.
- Can I double the recipe? Yes, you can easily double or even triple the recipe if you’re serving a larger crowd. Just keep in mind that you might need to adjust the baking time slightly if you’re making a larger batch.
Conclusion
Making Honey Butter Biscuits is a rewarding baking experience that yields delicious results with minimal effort. Whether you’re a fan of sweet treats or looking for a comforting snack, these biscuits are sure to please. Feel free to experiment with different flavors and ingredients to make the recipe your own, and don’t hesitate to share your creations with friends and family. Baking is all about joy and sharing that joy with others, so go ahead, get baking, and spread the love!