Craving something sweet and easy to make? These homemade chocolate tarts are a quick family favorite dessert made with rich dark chocolate and a buttery crust, perfect for a weeknight dinner treat, save for later
Chocolate Tarts
Introduction
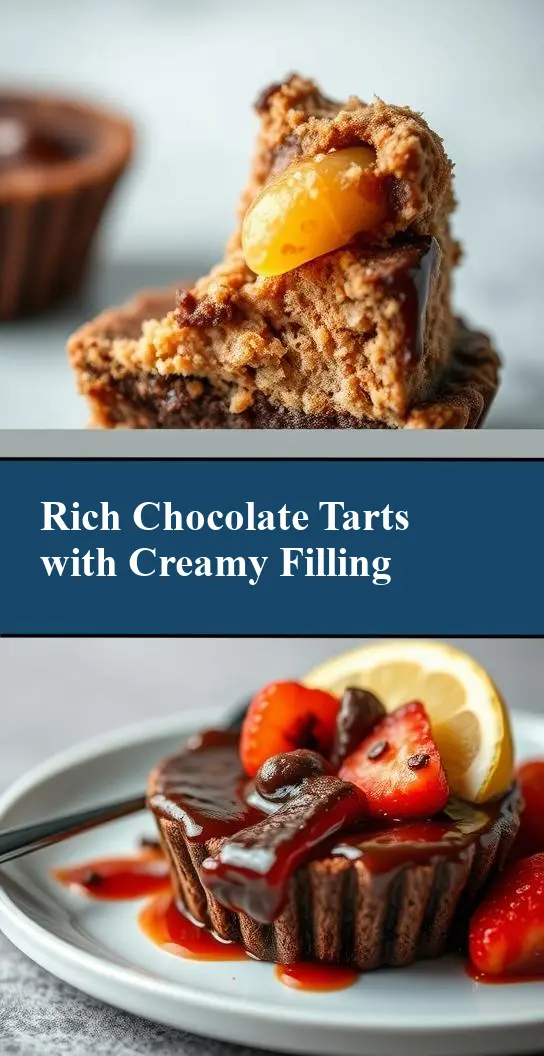
Indulge in the rich flavors of chocolate with our decadent Chocolate Tarts recipe, a delightful treat that combines the simplicity of everyday ingredients with the creativity of a professional pastry chef. These bite-sized masterpieces are not only easy to make but also offer a canvas for your creativity, allowing you to experiment with various flavors and toppings. Whether you’re a chocolate aficionado or just looking for a dessert to impress your guests, these Chocolate Tarts are sure to satisfy your cravings and leave a lasting impression.
Why This Works
- Flavor balance and ingredient accessibility: The combination of dark chocolate, creamy fillings, and flaky pastry crusts creates a perfect harmony of flavors, and the ingredients are easily found in most grocery stores.
- Ease of preparation: Despite their elegant appearance, Chocolate Tarts are surprisingly simple to prepare, requiring minimal cooking skills and effort.
- Impressive results with minimal effort: The end result is a beautifully presented dessert that looks like it was made by a professional, perfect for special occasions or as a sweet treat any time of the year.
Key Ingredients
The main ingredients for our Chocolate Tarts include high-quality dark chocolate, which provides the deep, rich flavor; a flaky pastry crust made from butter, flour, and water; and a creamy filling that can be customized with your choice of nuts, fruits, or spices. For practical substitutions, you can use milk chocolate or a combination of chocolates for a different flavor profile, and for the crust, you can opt for a gluten-free flour mix or use pre-made pastry sheets for convenience.
Instructions
- Step 1: Begin by preparing your ingredients. Chop the dark chocolate into small pieces and set it aside. Measure out the flour, butter, and water for the pastry crust, and ensure your filling ingredients are ready to use.
- Step 2: Cook or mix the base ingredients. For the pastry crust, combine the flour, butter, and water in a bowl and mix until a dough forms. Wrap the dough in plastic wrap and refrigerate for at least 30 minutes. For the filling, melt the chocolate in a double boiler or in the microwave in 30-second increments, stirring between each interval until smooth.
- Step 3: Layer flavors or textures. Roll out the chilled pastry dough to your desired thickness and cut out circles to fit your tart molds. Fill each tart shell with a spoonful of your prepared filling, and then top with additional ingredients such as nuts or fruit if desired.
- Step 4: Final touches and plating. Once the tarts are filled, place them in the refrigerator to set. Just before serving, you can garnish with additional chocolate shavings, powdered sugar, or fresh fruits to enhance the presentation and flavor.
Handy Tips
- For a crisper pastry crust, ensure it is well chilled before baking. If using a pre-made crust, follow the package instructions for thawing and baking.
- Avoid overfilling the tarts, as this can cause them to spill over during chilling or serving. Leave a small border around the edges for a clean finish.
- Experiment with different types of chocolate and fillings to find your favorite combinations. Nuts, caramel, and fruit preserves are all great options to consider.
Heat Control
If heat is used, such as for melting chocolate or baking the pastry crust, it’s essential to control the temperature and timing carefully. For melting chocolate, use a double boiler or microwave-safe bowl in short intervals, stirring between each heating to prevent burning. For baking the crust, preheat your oven to 375°F (190°C) and bake for 15-20 minutes, or until the crust is golden brown. Keep an eye on the tarts to prevent overcooking, which can lead to a dry or burnt crust.
Crunch Factor
The crunch factor in Chocolate Tarts comes from the flaky pastry crust and any additional toppings such as nuts. To achieve a perfectly flaky crust, ensure that your butter and water are cold, and do not overwork the dough. For toppings, choose nuts that complement the flavor of your chocolate, such as almonds or hazelnuts, and sprinkle them on top of the filling before serving.
Pro Kitchen Tricks
- Use high-quality chocolate for the best flavor. Dark chocolate, in particular, offers derin depth and complexity that elevates the entire dessert.
- For an extra crispy crust, brush the tops with a little bit of egg wash (beaten egg mixed with a bit of water) before baking. This will give your tarts a golden, glossy finish.
- Consider using a pastry bag to fill the tarts for a cleaner, more precise application of the filling. This is especially helpful if you’re using a soft or runny filling.
Storage Tips
- Leftover Chocolate Tarts can be stored in an airtight container in the refrigerator for up to 3 days. Allow them to come to room temperature before serving for the best flavor and texture.
- For longer storage, consider freezing the baked and cooled pastry shells without the filling. Simply thaw and fill as needed. Filled tarts can also be frozen, but the texture of the filling may change slightly upon thawing.
- The best containers for storing Chocolate Tarts are those that are airtight and can protect the delicate pastry from moisture and other flavors. Glass or plastic containers with tight-fitting lids are ideal.
Gift Packaging Ideas
If you’re considering gifting your Chocolate Tarts, presentation is key. Place the tarts in a decorative tin or box lined with parchment paper or a silicone mat. You can also wrap each tart individually in plastic wrap or aluminum foil and then place them in a gift box. Add a ribbon or a gift tag with a personal message for a thoughtful touch. For a more rustic look, use a wooden crate or a basket lined with a checkered cloth, and don’t forget to include a card with serving suggestions or storage tips.
Flavor Variations
- 🌟 Different spices: Consider adding a pinch of salt, a teaspoon of vanilla extract, or a sprinkle of cinnamon to your chocolate filling for a unique twist.
- 🌟 Creative toppings: Consider using different types of nuts (walnuts, pecans), dried fruits (cranberries, cherries), or even candy pieces (M&M’s, chopped peanut butter cups) to top your tarts.
- 🌟 Ingredient swaps: For a dairy-free version, use a non-dairy milk and vegan chocolate. For a gluten-free crust, opt for a gluten-free flour mix and adjust the liquid content accordingly.
Troubleshooting
- Texture problems: If your crust turns out too hard, it may have been overworked or overbaked. If too soft, it might not have been chilled enough or was underbaked.
- Ingredient replacements: Always try to substitute ingredients with something similar in texture and flavor. For example, if a recipe calls for heavy cream, you might substitute it with half-and-half or a non-dairy alternative.
- Over/undercooking signs: Keep an eye on your tarts while they’re baking. An underbaked crust will be pale and soft, while an overbaked one will be dark and hard. Adjust your baking time as needed based on your oven’s performance.
FAQs
- Can I freeze it? Yes, you can freeze both the baked pastry shells and the filled tarts. However, the texture and consistency might slightly change upon thawing.
- Is it gluten-free? The original recipe includes wheat flour, making it not gluten-free. However, you can easily adapt it by using a gluten-free flour mix and adjusting the recipe accordingly.
- Can I double the recipe? Yes, you can double or even triple the recipe if you’re making the tarts for a larger crowd. Just ensure you have enough tart molds and adjust the baking time if necessary.
Conclusion
Making Chocolate Tarts is a fun and rewarding process that allows you to express your creativity and indulge in rich, chocolatey goodness. With these simple steps and handy tips, you’re well on your way to creating your own masterpieces. Don’t be afraid to experiment with different flavors and toppings to make the recipe your own, and consider sharing your creations with friends and family as a thoughtful gift. Happy baking, and enjoy every bite of your delicious Chocolate Tarts!