Looking for a quick and easy dessert idea? Try these homemade Bunny Tail Cake Pops made with simple cake and frosting, perfect for a family favorite treat, save for later
Bunny Tail Cake Pops
Introduction
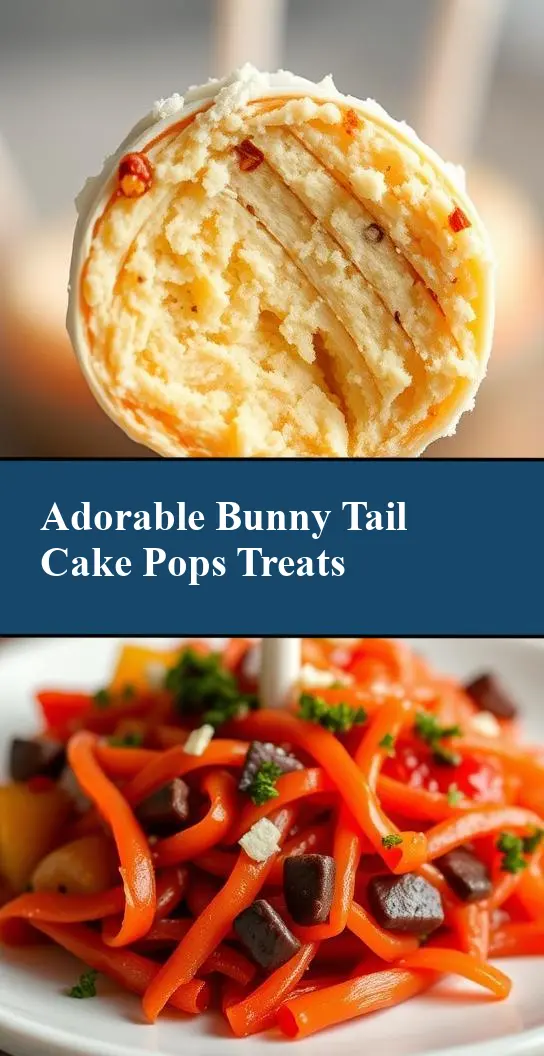
Spring into the season with these adorable and delicious Bunny Tail Cake Pops, perfect for Easter gatherings, birthday parties, or just a fun baking project with the family. These bite-sized treats are not only easy to make using everyday ingredients but also offer a delightful combination of flavors and textures that are sure to impress both kids and adults. With their creative presentation, they make a wonderful centerpiece or gift for any occasion, showcasing your creativity and baking skills without requiring extensive culinary experience.
Why This Works
- Flavor balance and ingredient accessibility: The combination of moist cake, creamy frosting, and the crunch of the candy coating creates a delightful harmony of flavors and textures that everyone will love. Plus, all the ingredients are easily found in most supermarkets.
- Ease of preparation: Despite their adorable and intricate appearance, Bunny Tail Cake Pops are surprisingly easy to make. The process involves simple steps like baking a cake, mixing frosting, and dipping the cake pops into candy melts, making it a fun project for beginners and experienced bakers alike.
- Impressive results with minimal effort: What’s most appealing about these cake pops is how they can elevate any gathering or party with their unique presentation, requiring minimal effort for the impressive outcome they provide.
Key Ingredients
The main ingredients for Bunny Tail Cake Pops include a box of cake mix (any flavor of your choice, but vanilla or carrot cake works particularly well for this theme), a can of frosting, candy melts in white and pastel colors, lollipop sticks or cake pop sticks, and edible decorations such as sprinkles or small candies for the bunny’s face and tail. For a more personalized touch, you can also use homemade cake and frosting recipes. Practical substitutions can include using different types of candy for the coating or experimenting with various cake flavors to match your theme or preferences.
Instructions
- Step 1: Begin by baking the cake according to the box instructions and letting it cool completely. Once cooled, crumble the cake into a large mixing bowl.
- Step 2: Mix a small amount of frosting into the crumbled cake until it forms a dough-like consistency that holds together well but is not too wet. The exact amount of frosting may vary depending on the moistness of the cake.
- Step 3: Use a small cookie scoop or your hands to form the cake mixture into balls, about 1.5 inches in diameter. Insert a lollipop stick into each ball, making sure it’s centered and the cake is secure around the stick.
- Step 4: Melt the white candy melts in a microwave-safe bowl in 30-second increments, stirring between each interval until smooth. Dip the end of each cake pop into the melted candy to fully coat, using a fork or dipping tool to remove excess candy. Place the coated cake pops on a piece of parchment paper or a silicone mat. Before the candy hardens, add sprinkles or small candies to create the bunny’s face and tail. For the tail, you can use a small amount of melted candy to attach a marshmallow or a white chocolate chip to the back of the cake pop.
Handy Tips
- For a smoother candy coating, make sure the cake pops are chilled before dipping, and the candy melts are at the right temperature. If the candy is too hot, it can be too thin and pool at the bottom of the cake pop.
- Experiment with different cake flavors and frosting combinations to create unique taste experiences. For example, a lemon cake with a lightly sweetened lemon buttercream frosting can offer a refreshing twist.
- To avoid the cake pops from becoming too heavy and falling off the stick, ensure the cake balls are not too large and are securely attached to the stick.
Heat Control
When melting the candy melts, it’s crucial to control the heat to achieve the right consistency for coating. Melting in short intervals and stirring well between each heating ensures the candy doesn’t overheat and become too thin or separate. The ideal temperature for melting candy melts is around 105°F to 115°F, which can usually be achieved by melting them in a double boiler or in the microwave in short increments with frequent stirring.
Crunch Factor
The crunch factor in Bunny Tail Cake Pops comes from the candy coating and any additional decorations like sprinkles or small candies. To achieve the right crunch, ensure the candy coating is not too thick, as this can make the cake pops difficult to bite into. Also, chilling the cake pops after coating can help the candy set properly and maintain its crunch.
Pro Kitchen Tricks
- For a professional finish, use a turntable or a cake stand to display your Bunny Tail Cake Pops, especially if you’re presenting them at a party or as a gift.
- To make the process of dipping the cake pops into candy melts easier and less messy, use a deep microwave-safe bowl and dip the cake pops in one motion, tapping off the excess candy by gently tapping the fork or dipping tool against the side of the bowl.
- Consider using a candy melt specifically designed for cake pops, as these often have additives that help them set harder and provide a smoother finish.
Storage Tips
- Bunny Tail Cake Pops are best stored in an airtight container in the refrigerator for up to 5 days. Allow them to come to room temperature before serving for the best flavor and texture.
- For longer storage, you can freeze the undipped cake balls for up to 2 months. Simply thaw at room temperature or in the refrigerator when you’re ready to dip them in candy melts.
- When storing, make sure the cake pops do not touch each other to prevent the candy coating from sticking together.
Gift Packaging Ideas
Bunny Tail Cake Pops make adorable gifts, especially for Easter or spring-themed parties. Consider packaging them in small cellophane bags tied with pastel-colored ribbons or placing them in gift boxes filled with grass-like shredded paper. You can also attach a small gift tag with a bunny-themed message or the recipient’s name to add a personal touch.
Flavor Variations
- 🌟 Different spices: Add a pinch of cinnamon or nutmeg to the cake mix for a warm, spicy flavor.
- 🌟 Creative toppings: Use different types of sprinkles, edible glitter, or small candies to create unique and colorful bunny faces and tails.
- 🌟 Ingredient swaps: Replace traditional cake mix with gluten-free options or use dairy-free frosting for guests with dietary restrictions.
Troubleshooting
- Texture problems: If the cake mixture is too dry, add a bit more frosting. If it’s too wet, add a bit more cake crumbs.
- Ingredient replacements: If you can’t find candy melts, you can use white chocolate chips as a substitute, though the result might be slightly different in texture and appearance.
- Over/undercooking signs: Ensure the cake is fully baked and a toothpick inserted comes out clean. For the candy coating, if it’s too thin, it will pool at the bottom of the cake pop. If it’s too thick, it won’t coat smoothly.
FAQs
- Can I freeze it? Yes, you can freeze the cake balls before dipping them in candy melts for up to 2 months.
- Is it gluten-free? It can be made gluten-free by using gluten-free cake mix and ensuring all the other ingredients, including the candy melts, are gluten-free.
- Can I double the recipe? Yes, you can easily double or triple the recipe to make more Bunny Tail Cake Pops, just be sure to have enough candy melts and sticks on hand.
Conclusion
Making Bunny Tail Cake Pops is a fun and rewarding baking project that combines creativity with delicious flavors. With these easy steps and handy tips, you’re on your way to creating adorable treats that are perfect for any occasion. Don’t be afraid to experiment with different flavors and decorations to make your Bunny Tail Cake Pops truly unique. Whether you’re a seasoned baker or just starting out, these cake pops are sure to bring joy and delight to everyone who tries them. So, go ahead, get baking, and hop into the fun of creating your own Bunny Tail Cake Pops!