Need a quick dessert fix? These easy homemade Chocolate Peanut Butter Oatmeal Bars are a family favorite, made with rolled oats and creamy peanut butter, perfect for a weeknight treat, save for later
Chocolate Peanut Butter Oatmeal Bars
Introduction
Imagine a dessert that combines the richness of chocolate, the creaminess of peanut butter, and the hearty texture of oatmeal, all in one deliciously easy-to-make bar. These Chocolate Peanut Butter Oatmeal Bars are not just a treat for the taste buds, but they’re also incredibly simple to prepare, requiring minimal effort for a result that’s sure to impress. Using everyday ingredients, you can create a dessert that’s perfect for satisfying your sweet tooth, sharing with friends and family, or even gifting to loved ones. The best part? You can customize them to your liking with a variety of flavors and toppings, making each batch a unique creation.
Why This Works
- Flavor balance and ingredient accessibility: The combination of chocolate, peanut butter, and oatmeal provides a perfect balance of flavors and textures that everyone will love. Plus, these ingredients are readily available in most kitchens, making it easy to whip up a batch at any time.
- Ease of preparation: The simplicity of the recipe is one of its strongest points. With just a few steps, you can have a tray of these delicious bars ready to go into the oven. The no-fuss preparation makes it a great option for busy days or when you need a quick dessert.
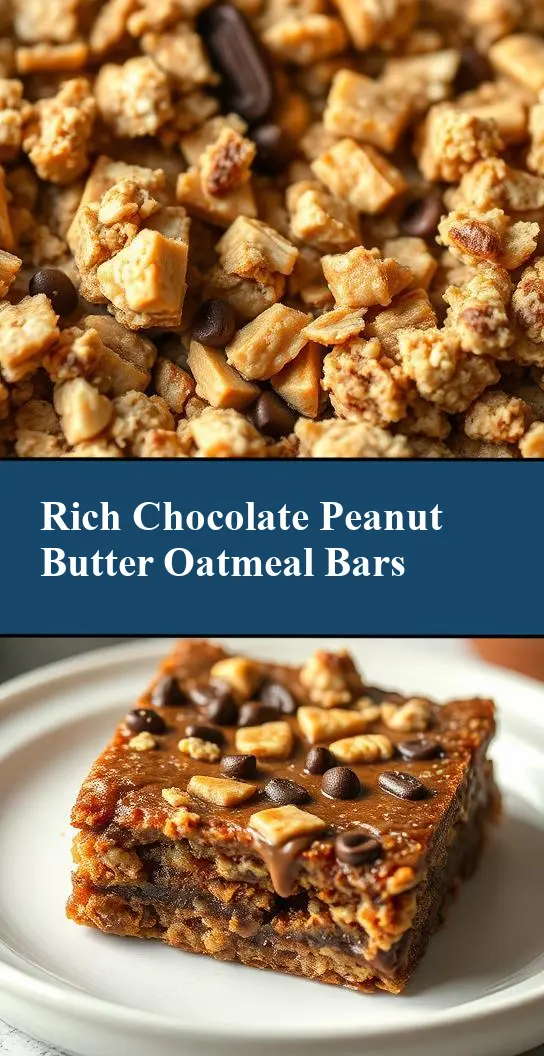
- Impressive results with minimal effort: Despite the ease of preparation, these bars look and taste like they came from a professional bakery. The layered effect of the oatmeal base, the peanut butter mixture, and the chocolate topping creates a visually appealing dessert that’s sure to be a hit at any gathering.
Key Ingredients
The main ingredients in these Chocolate Peanut Butter Oatmeal Bars include rolled oats, creamy peanut butter, granulated sugar, brown sugar, eggs, vanilla extract, salt, and semi-sweet chocolate chips. For the peanut butter, you can use either creamy or crunchy, depending on your preference for texture. If you’re looking for a substitution for peanut butter, almond butter or cashew butter can work well, though they’ll give a slightly different flavor. For the chocolate, while semi-sweet chips are recommended for the balance of sweetness and bitterness, you can also use milk chocolate chips for a sweeter bar or dark chocolate for a deeper, richer flavor.
Instructions
- Step 1: Begin by preheating your oven to 350°F (180°C). Line an 8-inch square baking pan with parchment paper or aluminum foil, leaving some overhang on the sides for easy removal. In a medium bowl, whisk together the oats, sugar, and salt. Stir in the melted butter until the mixture is evenly moistened. Press this oat mixture into the prepared baking pan.
- Step 2: Bake the oat base for about 20 minutes, or until it’s lightly browned. While the base is baking, prepare the peanut butter mixture. In a large bowl, combine the peanut butter, brown sugar, eggs, and vanilla extract. Mix until smooth and creamy. Once the oat base is ready, let it cool for a few minutes before spreading the peanut butter mixture over it.
- Step 3: Return the pan to the oven and bake for an additional 15-20 minutes, or until the peanut butter layer is set and the edges are lightly browned. Remove the pan from the oven and let it cool completely on a wire rack. Melt the chocolate chips in a double boiler or in the microwave in 30-second increments, stirring between each interval until smooth. Spread the melted chocolate over the cooled peanut butter layer.
- Step 4: Refrigerate the bars for at least 30 minutes to allow the chocolate to set. Then, use the overhanging parchment paper or foil to lift the bars out of the pan and transfer them to a cutting board. Cut into bars of your desired size and serve. For a cleaner cut, you can refrigerate the bars for about 10 minutes before cutting.
Handy Tips
- Avoid overmixing the oat base, as this can make it tough. Press it into the pan gently but firmly to ensure it’s evenly distributed. For the peanut butter mixture, make sure all the ingredients are at room temperature for the best results. If you find the peanut butter too sticky, you can refrigerate it for about 10 minutes to firm it up before spreading.
Heat Control
When baking the oat base and the peanut butter layer, keep an eye on them to ensure they don’t overcook. The ideal temperature is 350°F (180°C), and you should check for doneness by the lightly browned color and the set texture of the peanut butter layer. Avoid overbaking, as this can make the bars dry and crumbly.
Crunch Factor
The crunch factor in these bars comes from the oat base and the chocolate topping. To achieve the right crunch, make sure the oat base is baked until it’s lightly browned and set. For the chocolate, letting it set properly in the refrigerator will give it a nice snap when you cut into the bars. If you prefer a chewier bar, you can underbake the oat base slightly and not let the chocolate set as long.
Pro Kitchen Tricks
- For a shortcut, you can prepare the oat base and the peanut butter mixture ahead of time and store them in the refrigerator overnight. Assemble and bake the bars the next day. To make cleanup easier, line your pans with parchment paper and use a silicone spatula for mixing and spreading the peanut butter and chocolate layers.
Storage Tips
- These bars can be stored in an airtight container at room temperature for up to 5 days. For longer storage, you can refrigerate them for up to 2 weeks or freeze them for up to 2 months. When freezing, cut the bars first and then place them in a single layer in a freezer-safe bag or container. To reheat, simply thaw at room temperature or refrigerate overnight.
Gift Packaging Ideas
These Chocolate Peanut Butter Oatmeal Bars are perfect for gifting, especially during holidays or as a thank-you gift. Consider packaging them in decorative tins, jars, or even cellophane bags tied with a ribbon. You can also add a personal touch by including a handwritten note or a sprinkle of sea salt on top of the chocolate layer before it sets.
Flavor Variations
- 🌟 Different spices: Add a pinch of cinnamon, nutmeg, or cardamom to the oat base for a unique twist.
- 🌟 Creative toppings: Before the chocolate sets, sprinkle some chopped nuts, sea salt, or shredded coconut on top for added texture and flavor.
- 🌟 Ingredient swaps: Use different types of nut butter, like almond or cashew butter, for a change in flavor. You can also add dried fruits or candy pieces to the peanut butter mixture for added sweetness and texture.
Troubleshooting
- Texture problems: If the bars turn out too dry, it might be due to overbaking. If they’re too wet, it could be from underbaking the oat base or not letting the peanut butter layer set properly.
- Ingredient replacements: Always try to use the ingredients called for in the recipe for the best results. However, if you need to substitute, make sure the replacement ingredient has a similar consistency and flavor profile.
- Over/undercooking signs: Keep an eye on the bars while they’re baking. If the edges start to brown too quickly, cover the pan with foil to prevent overcooking. If the peanut butter layer doesn’t seem set after the baking time, give it a few more minutes and check again.
FAQs
- Can I freeze it? Yes, these bars can be frozen for up to 2 months. Cut them first, then place them in a single layer in a freezer-safe bag or container.
- Is it gluten-free? The recipe as stated is not gluten-free due to the oats. However, you can use gluten-free oats as a substitute to make the bars gluten-free.
- Can I double the recipe? Yes, you can double the recipe. Just keep in mind that you’ll need a larger baking pan, such as a 9×13 inch pan, and you might need to adjust the baking time slightly.
Conclusion
Making these Chocolate Peanut Butter Oatmeal Bars is a fun and rewarding experience that yields delicious results with minimal effort. Whether you’re a seasoned baker or just starting out, this recipe is perfect for anyone looking to satisfy their sweet tooth or share a tasty treat with others. Feel free to experiment with different flavors and toppings to make the recipe your own, and don’t hesitate to reach out if you have any questions or need further substitutions or variations. Happy baking, and enjoy every bite of these scrumptious bars!