What’s the perfect summer dessert when it’s too hot to bake? This easy no bake summer berry icebox cake is a quick homemade solution, made with fresh berries and a simple cream filling. Save this idea for a family favorite treat that’s sure to please on a weeknight or any night. Try it soon and enjoy the cooling delight of a no bake dessert. Pin for later and make it your new go-to easy dessert recipe.
Easy No Bake Summer Berry Icebox Cake
Introduction
Welcome to the sweetest and easiest dessert recipe for the summer: the No Bake Summer Berry Icebox Cake. This refreshing treat is perfect for hot summer days when the last thing you want to do is spend time in a sweltering kitchen. With its simple, no-bake instructions and the use of everyday ingredients, this cake is not only a delight to the taste buds but also a testament to the magic of effortless creativity in cooking. The combination of fresh summer berries, creamy textures, and the lightness of whipped cream, all come together to create a dessert that is as impressive as it is easy to make.
Why This Works
- The balance of flavors between the sweetness of the berries, the tanginess of the cream, and the slight crunch of the cookie base creates a delightful harmony that pleases the palate.
- The accessibility of the ingredients and the straightforward preparation make this dessert approachable for anyone, regardless of their baking experience.
- Despite the minimal effort required, the final result is impressive and perfect for gatherings or special occasions, making it a great option for those looking to wow without the fuss.
Key Ingredients
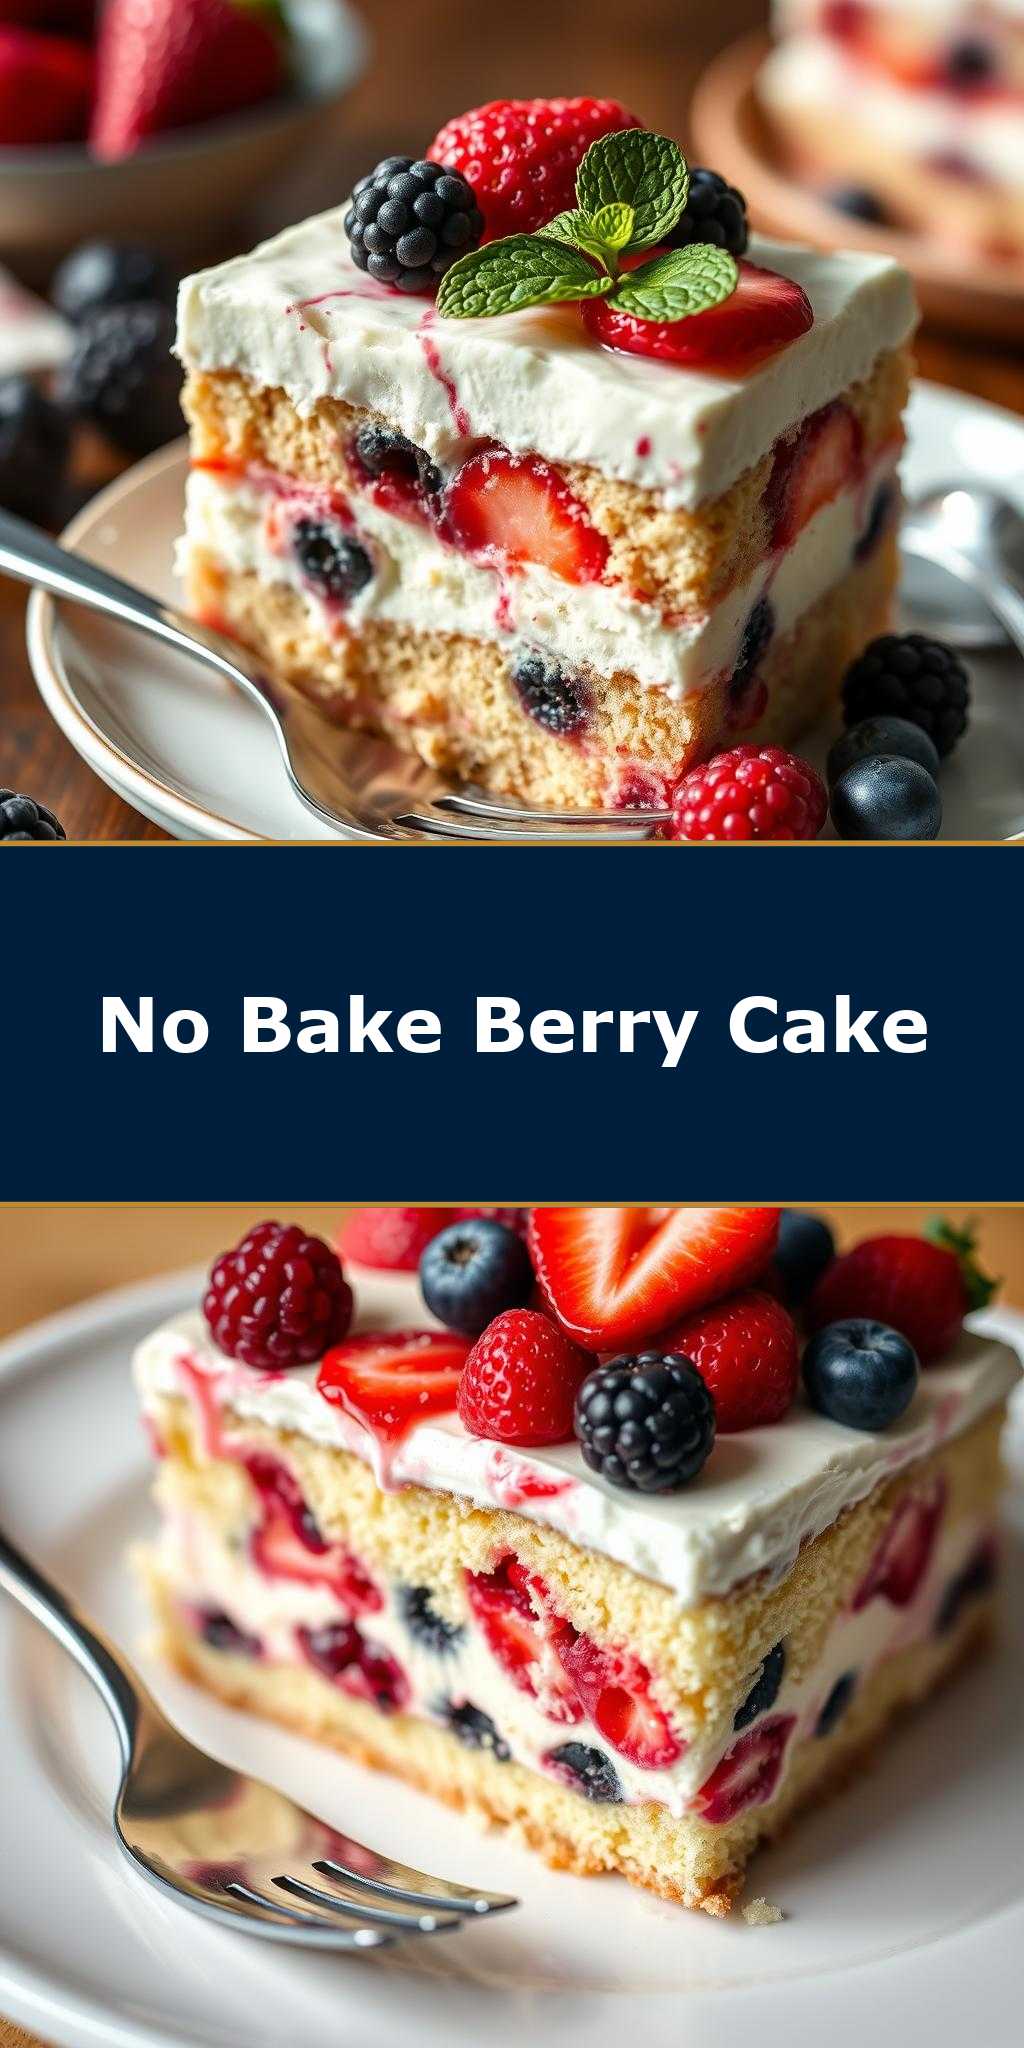
The main ingredients for this Easy No Bake Summer Berry Icebox Cake include fresh summer berries (such as strawberries, blueberries, and raspberries), a package of ladyfingers or similar cookies, whipped cream, and a bit of sugar to balance the flavors. For practical substitutions, you can use other types of berries or even a mix of frozen berries if fresh ones are not available. Additionally, if ladyfingers are hard to find, you can substitute them with sponge cake or even cookies like savoiardi.
Instructions
- Step 1: Begin by preparing your ingredients. Wash and chop the fresh berries, set aside. In a large bowl, whip the heavy cream until it becomes stiff peaks, then add a bit of sugar to taste and mix well.
- Step 2: Dip each ladyfinger into a mixture of milk and sugar (if desired) for a few seconds on each side. They should be soft and pliable but not too wet.
- Step 3: Start building your cake by creating a layer of ladyfingers in the bottom of a serving dish. You can trim them to fit the dish. Next, spread a layer of whipped cream over the ladyfingers, followed by a layer of fresh berries. Repeat this process until you run out of ingredients, finishing with a layer of whipped cream on top.
- Step 4: Decorate the top of the cake with additional fresh berries and refrigerate for at least 3 hours or overnight to allow the flavors to meld together and the cake to set.
Handy Tips
- Make sure to not over-soak the ladyfingers, as this can make the cake too soggy. A quick dip is all you need.
- Experiment with different types of berries and their combinations to find your favorite flavor profile.
- For a more intense berry flavor, you can also use a berry jam or preserves as an additional layer in the cake.
Heat Control
Since this is a no-bake recipe, there’s no need to worry about heat control. However, it’s essential to chill the cake in the refrigerator for the recommended time to allow the flavors to meld and the textures to set properly.
Crunch Factor
The crunch in this dessert comes from the fresh berries and the ladyfingers, which provide a nice textural contrast to the smooth whipped cream. To maintain the crunch of the berries, it’s best to assemble the cake just before serving, or at least add the final layer of berries just before serving to prevent them from getting too soft.
Pro Kitchen Tricks
- To ensure your whipped cream stays stiff and doesn’t weep, make sure your bowl and beaters are chilled before whipping, and don’t over-whip the cream.
- For a cleaner presentation, you can use a pastry bag to pipe the whipped cream onto the cake, creating a smooth and even top layer.
Storage Tips
- The cake can be stored in the refrigerator for up to 24 hours. It’s best to cover it with plastic wrap or aluminum foil to prevent it from drying out.
- Freezing is not recommended as it can affect the texture of the whipped cream and the ladyfingers. However, you can freeze the components separately (e.g., freeze the whipped cream in an airtight container and the ladyfingers in a separate bag) and assemble the cake when you’re ready to serve.
Gift Packaging Ideas
This cake makes a wonderful gift, especially during the summer months. Consider placing individual servings in cute glass jars or containers, topping each with a fresh berry and a sprig of mint. You can tie a ribbon around the jar for a charming and rustic look. For a more substantial gift, you can package the entire cake in a large, decorative serving dish and cover it with plastic wrap or a large piece of parchment paper, secured with a ribbon.
Flavor Variations
- Try adding a sprinkle of cinnamon or cocoa powder to the whipped cream for a different twist on the classic flavor.
- Use different types of cookies or cakes for the base, such as chocolate sandwich cookies or pound cake, to change up the flavor profile.
- Experiment with liqueurs like Grand Marnier or Cointreau by brushing them onto the ladyfingers before assembling the cake for a more adult-oriented dessert.
Troubleshooting
- If your whipped cream becomes too runny, you can try chilling it in the freezer for about 10 minutes and then re-whipping it until it stiffens up again.
- If the ladyfingers become too soggy, it might be due to over-soaking. Try using them immediately after dipping, or let them sit for a minute to absorb excess moisture before using.
- If the cake doesn’t set properly, it could be due to not chilling it long enough. Give it a few more hours in the refrigerator to allow the flavors and textures to meld together.
FAQs
- Can I freeze it? While it’s possible to freeze the components separately, it’s not recommended to freeze the assembled cake due to the potential for texture changes in the whipped cream and ladyfingers.
- Is it gluten-free? Depending on the type of cookies or ladyfingers used, this cake can be adapted to be gluten-free by choosing gluten-free alternatives.
- Can I double the recipe? Yes, you can easily double or even triple the recipe if you’re serving a larger crowd. Just be sure to adjust the size of your serving dish accordingly.
Conclusion
The Easy No Bake Summer Berry Icebox Cake is a versatile, delicious, and refreshing dessert perfect for any summer gathering. With its ease of preparation, impressive presentation, and delightful flavors, it’s sure to become a favorite among your family and friends. Don’t hesitate to experiment with the recipe, trying out different berries, flavor combinations, and presentation ideas to make it your own. Whether you’re a seasoned baker or a beginner in the kitchen, this cake is a must-try for the warmest season of the year.