Craving a decadent dessert to impress your family? This easy homemade banana pudding ice cream cake made with ripe bananas and creamy vanilla ice cream is a quick family favorite – Save for later
Banana Pudding Ice Cream Cake
Introduction
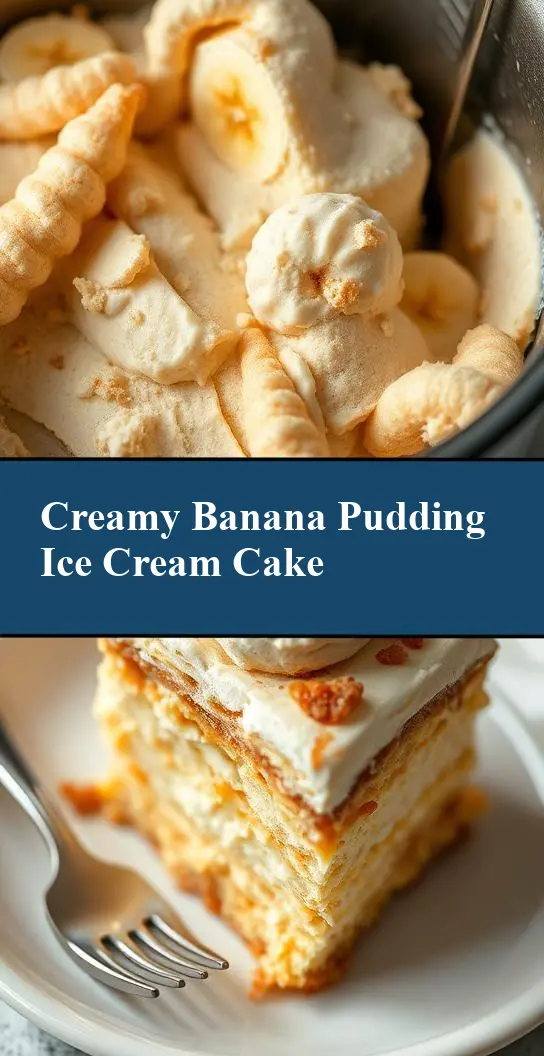
Imagine a dessert that combines the creamy richness of ice cream, the velvety smoothness of pudding, and the sweet, comforting flavor of bananas, all layered into a magnificent cake. The Banana Pudding Ice Cream Cake is a masterpiece of textures and flavors, perfect for special occasions or as a unique treat any time of the year. What’s more, it’s surprisingly easy to make, requiring minimal baking and utilizing everyday ingredients that you might already have in your pantry. This recipe is all about creativity and simplicity, making it accessible to anyone looking to impress their family and friends with a show-stopping dessert.
Why This Works
- Flavor balance and ingredient accessibility: The combination of bananas, pudding, and ice cream creates a well-balanced flavor profile that is both familiar and exciting. The ingredients are easy to find in most grocery stores, making this dessert accessible to everyone.
- Ease of preparation: Despite its impressive appearance, the Banana Pudding Ice Cream Cake is relatively easy to prepare. It requires some planning ahead for freezing times, but the actual assembly and preparation are straightforward and fun.
- Impressive results with minimal effort: The layering of different textures and flavors creates a visually stunning dessert that looks like it was made by a professional. The best part is that it requires minimal effort compared to other desserts of similar complexity.
Key Ingredients
The main ingredients for this recipe include ripe bananas, vanilla ice cream, vanilla pudding mix, heavy cream, sugar, and Nilla wafers for the crust. For the pudding, you’ll need milk and a bit of butter for richness. Practical substitutions can be made, such as using different types of cookies for the crust or adding a pinch of salt to balance the sweetness. The beauty of this recipe lies in its flexibility and the ability to customize it to your taste preferences.
Instructions
- Step 1: Begin by preparing your crust. Crush the Nilla wafers in a blender or with a rolling pin and mix with a bit of melted butter until the crumbs are evenly moistened. Press this mixture into the bottom of a springform pan and freeze until set.
- Step 2: Next, prepare the pudding according to the package instructions using milk, and then chill it in the refrigerator until it’s set. Meanwhile, slice the bananas and set them aside.
- Step 3: Once the pudding is chilled, it’s time to assemble the cake. Start with a layer of pudding, followed by a layer of sliced bananas, and then a layer of vanilla ice cream. Repeat this process until you’ve used up all your ingredients, ending with a layer of ice cream on top.
- Step 4: For the final touches, you can garnish the top of the cake with additional sliced bananas, whipped cream, or a sprinkle of Nilla wafer crumbs. Place the cake in the freezer to set before serving.
Handy Tips
- To ensure that your cake sets properly, make sure each layer is frozen before adding the next. This will prevent the layers from mixing and will give your cake a clean, defined look.
- For an extra crunchy crust, you can bake the Nilla wafer mixture in the oven for a few minutes before freezing it. Just keep an eye on it to make sure it doesn’t burn.
- Consider using high-quality vanilla extract in your pudding and ice cream for the best flavor. A little goes a long way, so start with a small amount and taste as you go.
Heat Control
If you decide to bake your crust for extra crunch, keep the oven at a low temperature (around 350°F) and check on it frequently. The crust is ready when it’s lightly toasted and fragrant. If you’re using a conventional oven, you might need to adjust the time based on your oven’s performance.
Crunch Factor
The crunch in this dessert comes from the Nilla wafer crust. To achieve the perfect crunch, don’t overmix the crust ingredients, as this can make the crust dense and hard. Instead, mix until the crumbs are just moistened and press them gently into the pan. If you bake the crust, a light golden color is a good indicator of doneness.
Pro Kitchen Tricks
- To make the assembly easier, have all your ingredients ready and chilled. This includes having your pudding set, your bananas sliced, and your ice cream softened slightly for easier spreading.
- For a shortcut, use store-bought vanilla pudding or ice cream to save time on preparation. Just make sure to choose high-quality products for the best flavor.
- Consider using a cake stand or a turntable to display your finished cake. This will not only make it easier to serve but also add to the dramatic presentation.
Storage Tips
- The Banana Pudding Ice Cream Cake is best stored in the freezer. Wrap it tightly in plastic wrap or aluminum foil to prevent freezer burn and other flavors from affecting it.
- When you’re ready to serve, remove the cake from the freezer and let it sit at room temperature for about 10-15 minutes to soften slightly. This will make it easier to slice and serve.
- Leftovers can be stored in the freezer for up to a month. Simply wrap individual slices tightly and freeze. When you’re ready for a treat, just thaw a slice at room temperature or in the refrigerator.
Gift Packaging Ideas
If you’re looking to give this dessert as a gift, consider packaging it in a decorative tin or a sturdy cardboard box lined with parchment paper. You can also add a personal touch with a ribbon around the box or a handwritten note with serving instructions. For a more rustic look, wrap the cake in brown paper and twine, adding a gift tag with a personal message.
Flavor Variations
- 🌟 Different spices: Add a pinch of cinnamon, nutmeg, or cardamom to the pudding for a unique twist on the classic flavor.
- 🌟 Creative toppings: Use different types of cookies for the crust, such as chocolate sandwich cookies or peanut butter cookies, for a different flavor profile. You can also top the cake with whipped cream, caramel sauce, or chopped nuts for added texture and flavor.
- 🌟 Ingredient swaps: Substitute the vanilla pudding with another flavor, like chocolate or strawberry, for a completely different dessert. You can also use different types of milk or add a splash of liqueur to the pudding for added depth of flavor.
Troubleshooting
- Texture problems: If your cake is too icy, it might be because the ice cream wasn’t softened enough before assembly. If it’s too soft, it might be because it wasn’t frozen long enough. Adjust the freezing time based on your freezer’s performance.
- Ingredient replacements: If you can’t find Nilla wafers, you can substitute them with another type of cookie or even graham crackers. Just be aware that the flavor and texture might be slightly different.
- Over/undercooking signs: Since this dessert doesn’t require baking (except for the optional crust), you don’t have to worry about overcooking. However, make sure each layer is frozen before adding the next to prevent a soggy texture.
FAQs
- Can I freeze it? Yes, the Banana Pudding Ice Cream Cake is meant to be frozen. In fact, freezing is what holds the cake together and gives it its signature texture.
- Is it gluten-free? Depending on the ingredients you use, this cake can be gluten-free. Just make sure to choose gluten-free cookies for the crust and check the ingredients of your pudding and ice cream to ensure they are gluten-free as well.
- Can I double the recipe? Yes, you can easily double or even triple this recipe if you’re serving a large crowd. Just keep in mind that you’ll need a larger pan and possibly more freezing time to ensure the cake sets properly.
Conclusion
The Banana Pudding Ice Cream Cake is a testament to the magic that happens when simple ingredients come together in a creative way. It’s a dessert that’s sure to impress your guests and satisfy your sweet tooth. With its easy preparation, customizable ingredients, and stunning presentation, this cake is perfect for anyone looking to try something new and exciting. So don’t be afraid to get creative, experiment with different flavors, and most importantly, enjoy the process of making something truly special.