Craving a delicious breakfast treat? Try these easy homemade Buttermilk Blueberry Scones made with fresh blueberries and a hint of sweetness, perfect for a quick weeknight breakfast, save for later
Buttermilk Blueberry Scones
Introduction
Imagine waking up to the sweet aroma of freshly baked scones, infused with the tangy flavor of buttermilk and the sweetness of juicy blueberries. This recipe for Buttermilk Blueberry Scones is a game-changer for anyone looking to elevate their breakfast or brunch game. With just a few everyday ingredients and some simple steps, you can create a delicious and impressive treat that’s perfect for any occasion. Whether you’re a seasoned baker or a beginner in the kitchen, this recipe is easy to follow and requires minimal effort, making it a great way to get creative with your cooking.
Why This Works
- Flavor balance and ingredient accessibility: The combination of buttermilk, blueberries, and a hint of sugar creates a perfect balance of flavors that’s both tangy and sweet. Plus, the ingredients are easily accessible and can be found in most grocery stores.
- Ease of preparation: This recipe is incredibly easy to prepare, requiring just a few simple steps and minimal equipment. You can have your scones ready in under 30 minutes, making it a great option for busy mornings.
- Impressive results with minimal effort: Despite the ease of preparation, these scones are sure to impress your family and friends with their delicious flavor and tender texture. They’re perfect for serving at brunch or as a snack, and can even be packaged up as a gift for loved ones.
Key Ingredients
The key ingredients in this recipe include 1 1/2 cups all-purpose flour, 1/4 cup granulated sugar, 1/2 teaspoon baking powder, 1/2 teaspoon salt, 1/2 cup cold unsalted butter, 3/4 cup buttermilk, and 1 cup fresh or frozen blueberries. You can also substitute the buttermilk with a mixture of milk and vinegar or lemon juice if you don’t have any on hand. Additionally, you can use other types of sugar, such as brown sugar or honey, to give your scones a slightly different flavor.
Instructions
- Step 1: Preheat your oven to 400°F (200°C) and line a baking sheet with parchment paper. In a large bowl, whisk together the flour, sugar, baking powder, and salt. Cut the cold butter into the dry ingredients until the mixture resembles coarse crumbs.
- Step 2: In a separate bowl, whisk together the buttermilk and a pinch of salt. Add the wet ingredients to the dry ingredients and stir until the dough comes together in a shaggy mass. Gently fold in the blueberries.
- Step 3: Turn the dough out onto a floured surface and gently knead it a few times until it comes together. Pat the dough into a circle that’s about 1 inch (2.5 cm) thick. Use a biscuit cutter or the rim of a glass to cut out scones. Gather the scraps, re-form the dough, and cut out additional scones.
- Step 4: Place the scones on the prepared baking sheet, leaving about 1 inch (2.5 cm) of space between each scone. Brush the tops with a little extra buttermilk and sprinkle with granulated sugar. Bake the scones for 18-20 minutes, or until they’re golden brown.
Handy Tips
- Make sure to use cold ingredients, including the butter and buttermilk, to help the scones rise and give them a tender texture.
- Don’t overmix the dough, as this can lead to tough scones. Stop mixing as soon as the ingredients come together in a shaggy mass.
- Use fresh blueberries for the best flavor and texture. If you’re using frozen blueberries, make sure to thaw them first and pat them dry with a paper towel to remove excess moisture.
Heat Control
To ensure that your scones are cooked to perfection, keep an eye on them while they’re baking. They should be golden brown on top and firm to the touch. If you’re unsure whether they’re done, you can insert a toothpick into the center of a scone. If it comes out clean, the scones are ready. If not, give them a few more minutes and check again.
Crunch Factor
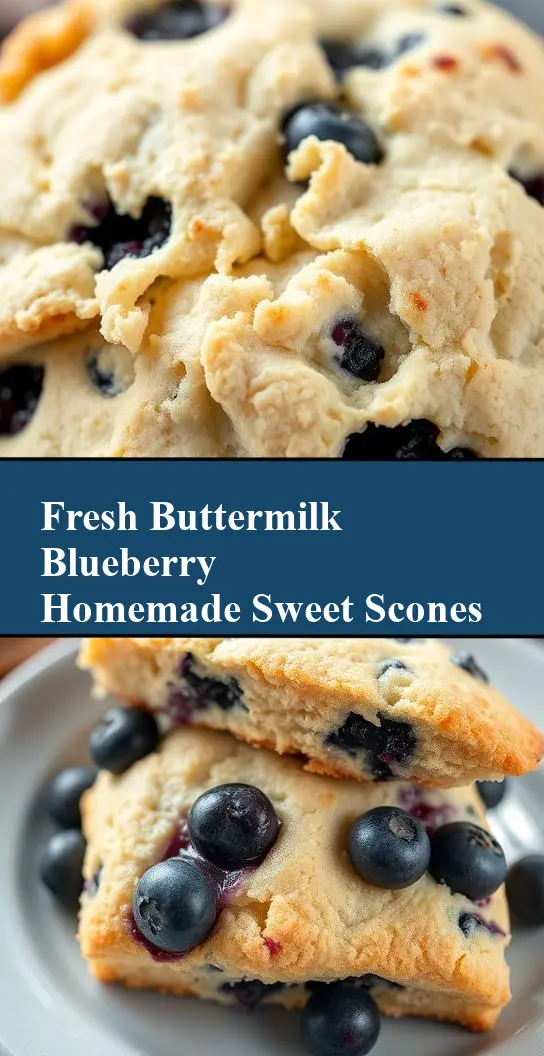
The outside of the scones should be crispy and golden brown, while the inside should be tender and flaky. To achieve this texture, make sure to brush the tops of the scones with a little extra buttermilk and sprinkle with granulated sugar before baking. This will help create a crunchy exterior and a tender interior.
Pro Kitchen Tricks
- Use a pastry blender to cut the butter into the dry ingredients. This will help create a flaky texture and prevent the butter from melting into the dough.
- Don’t overbake the scones. They should be lightly golden brown and still tender in the center. Overbaking can lead to dry, crumbly scones.
- Let the scones cool on a wire rack for a few minutes before serving. This will help them retain their shape and prevent them from becoming soggy.
Storage Tips
- Store leftover scones in an airtight container at room temperature for up to 2 days. You can also freeze them for up to 2 months and thaw them at room temperature or reheat them in the microwave.
- To reheat scones, wrap them in foil and bake them in a preheated oven at 350°F (180°C) for 5-7 minutes, or until they’re warmed through.
- Consider using a bread keeper or a paper bag to store your scones. These will help keep them fresh and prevent them from becoming stale.
Gift Packaging Ideas
These scones are perfect for gifting to friends and family. Consider packaging them in a decorative tin or a paper bag with a ribbon around it. You could also include a few extra treats, such as jam or clotted cream, to make the gift even more special. If you’re feeling extra creative, you could even make a gift basket filled with scones, tea, and other breakfast treats.
Flavor Variations
- 🌟 Try using different types of sugar, such as brown sugar or honey, to give your scones a slightly different flavor.
- 🌟 Add a sprinkle of cinnamon or nutmeg to the top of the scones before baking for an extra boost of flavor.
- 🌟 Use different types of milk, such as almond or soy milk, to make the scones dairy-free.
Troubleshooting
- Texture problems: If your scones are too dense or tough, it may be because you overmixed the dough. Try to mix the ingredients just until they come together in a shaggy mass, and then stop mixing.
- Ingredient replacements: If you don’t have buttermilk, you can make a substitute by mixing 1 cup of milk with 1 tablespoon of white vinegar or lemon juice. Let it sit for 5-10 minutes before using.
- Over/undercooking signs: If your scones are too brown or crispy, it may be because they’re overcooked. Try reducing the baking time or temperature to prevent this. If your scones are too pale or soft, it may be because they’re undercooked. Try baking them for a few more minutes to get the desired texture.
FAQs
- Can I freeze it? Yes, you can freeze the scones for up to 2 months. Simply place them in a single layer on a baking sheet, and then transfer them to a freezer-safe bag or container.
- Is it gluten-free? No, this recipe contains gluten due to the all-purpose flour. However, you can try substituting the flour with a gluten-free flour blend to make the scones gluten-free.
- Can I double the recipe? Yes, you can double the recipe to make more scones. Just keep in mind that you may need to adjust the baking time slightly to ensure that the scones are cooked through.
Conclusion
These Buttermilk Blueberry Scones are a delicious and easy-to-make treat that’s perfect for any occasion. With their tender texture and sweet, tangy flavor, they’re sure to become a favorite in your household. Whether you’re serving them for breakfast, brunch, or as a snack, they’re sure to impress. So go ahead, give this recipe a try, and enjoy the delicious taste of freshly baked scones!