What makes the perfect Easter treat? Try these homemade magic bars, loaded with sweetened condensed milk and crunchy pecans, for a quick and easy family favorite dessert – Save this idea
Homemade Easter Magic Bars Recipe
Introduction
As Easter approaches, the excitement of creating something magical and delicious for family and friends becomes a thrilling adventure. The Homemade Easter Magic Bars Recipe is a masterpiece of simplicity, flavor, and creativity, all combined in a dish that’s remarkably easy to make using everyday ingredients. These bars are a perfect blend of sweet and crunchy, with the vibrant colors of Easter candies and sprinkles adding to their festive charm. Whether you’re a seasoned baker or just starting out, this recipe promises to deliver impressive results with minimal effort, making it an ideal centerpiece for your Easter celebrations.
Why This Works
- Flavor balance and ingredient accessibility: The combination of a buttery graham cracker crust, sweet condensed milk, and the tanginess of Easter-themed candies creates a balanced flavor profile that appeals to a wide range of tastes. Moreover, the ingredients are easily accessible in most supermarkets, making it convenient to prepare.
- Ease of preparation: The magic of these bars lies in their simplicity. With just a few steps, you can transform basic ingredients into a show-stopping dessert. The no-bake aspect of the recipe (except for the crust) makes it even more appealing for those looking to avoid lengthy cooking times.
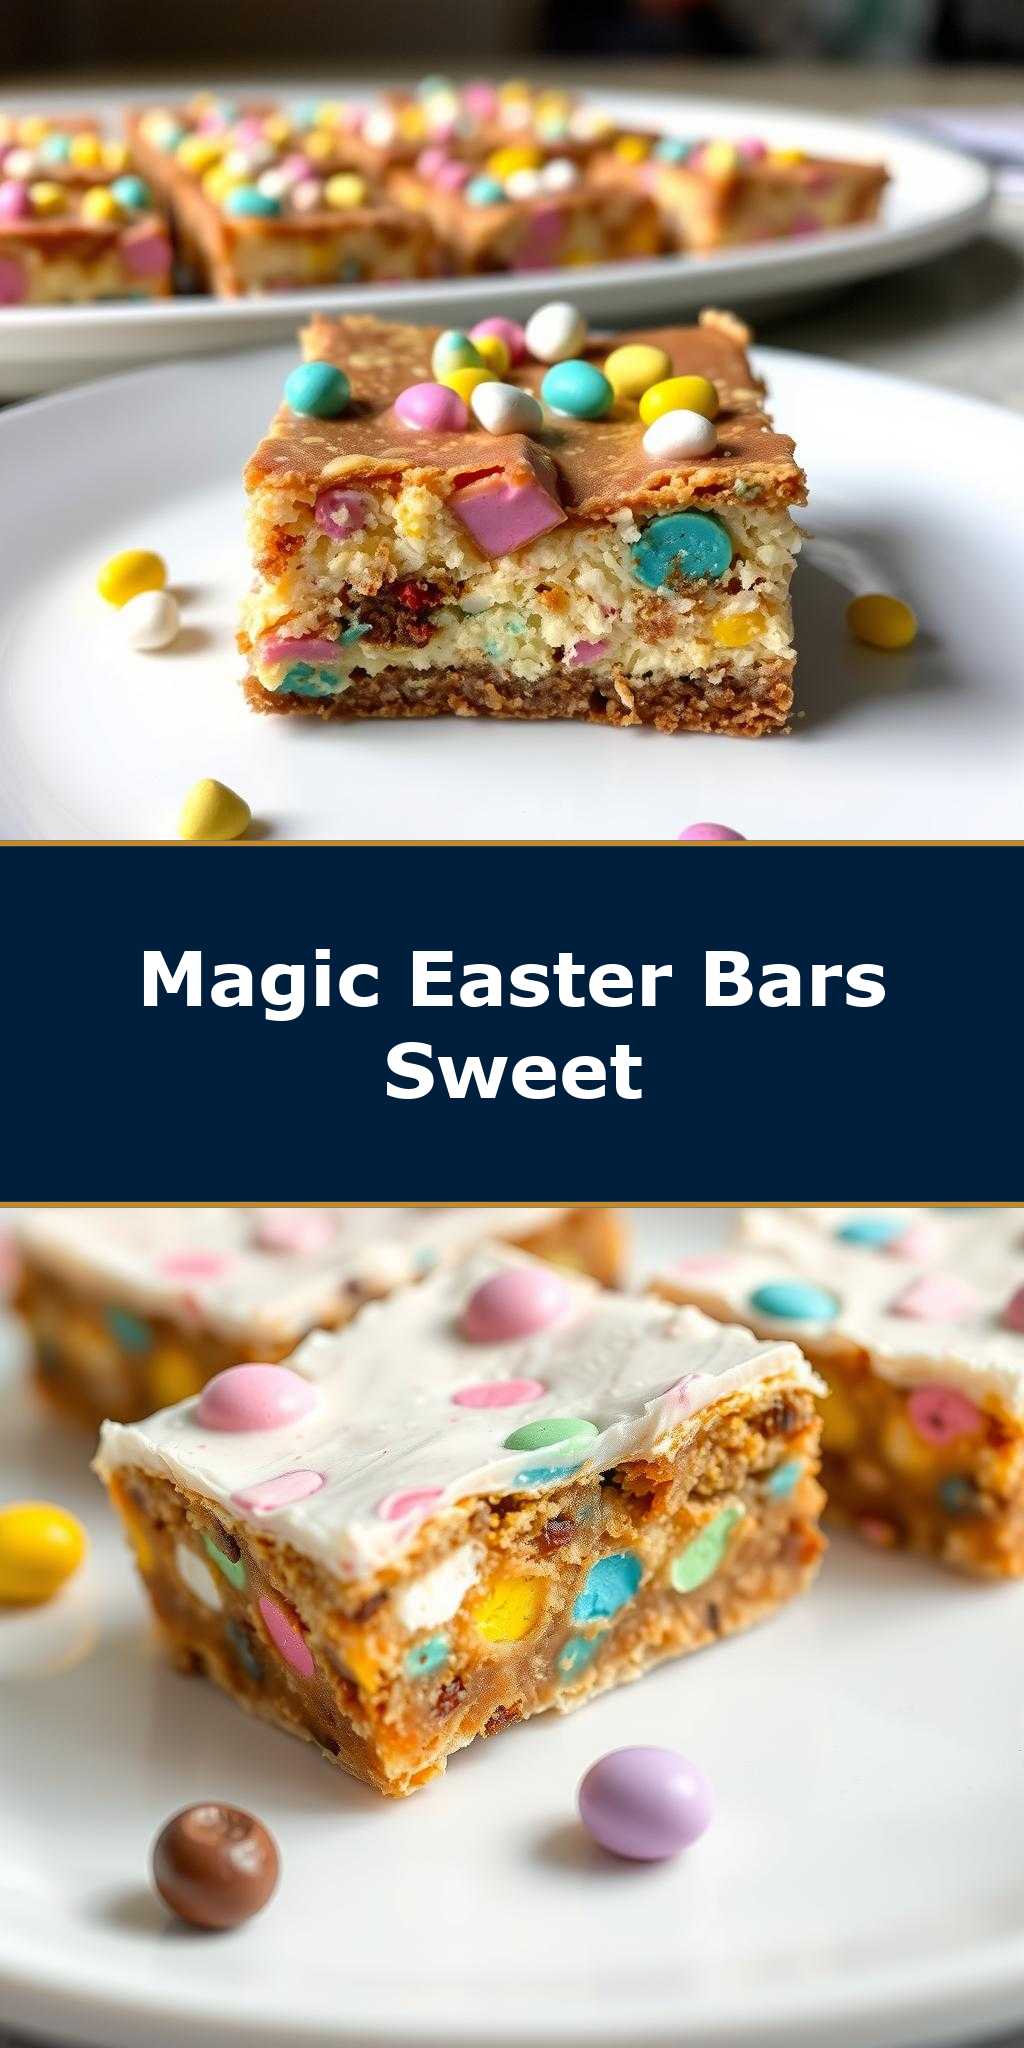
- Impressive results with minimal effort: Despite the ease of preparation, the Homemade Easter Magic Bars are incredibly impressive. The layering of different textures and colors, topped with a variety of Easter candies, makes for a visually stunning dessert that’s sure to be the highlight of any Easter gathering.
Key Ingredients
The magic of these bars starts with a few key ingredients. You’ll need a package of graham crackers for the crust, some melted butter to hold it together, a can of sweetened condensed milk for the creamy filling, and a variety of Easter candies and sprinkles for the topping. For the crust, you can also use digestive biscuits or any other similar crackers as a substitute. The sweetened condensed milk is essential for its unique flavor and texture, but you can experiment with different types of milk or creamy substances for variations. Lastly, the choice of Easter candies is entirely up to your preference, offering a fun opportunity to get creative and personalize your bars.
Instructions
- Step 1: Begin by preparing your crust. Crush the graham crackers in a food processor until they’re finely ground. Mix the crushed crackers with melted butter until well combined. Press this mixture into the bottom of a lined or greased 9×9 inch baking dish. Bake in a preheated oven at 350°F for about 8-10 minutes, or until lightly browned. Let it cool completely before proceeding.
- Step 2: Pour the sweetened condensed milk over the cooled crust. You can use it straight from the can or flavor it lightly with a hint of vanilla extract for added depth. Spread it evenly to cover the entire surface of the crust.
- Step 3: The fun part – decorating with Easter candies and sprinkles! Choose your favorite candies, whether they’re M&M’s, chopped peanut butter cups, or pastel-colored chocolate chips, and sprinkle them generously over the condensed milk layer. You can also add sprinkles or edible glitter for extra festivity.
- Step 4: Refrigerate the bars for at least 2 hours or until the condensed milk has set. Once set, remove them from the refrigerator, cut into bars, and serve. You can also wrap each bar individually in plastic wrap or aluminum foil for a fun and easy treat to go.
Handy Tips
- For a firmer crust, bake it for an additional 2 minutes, but keep an eye on it to avoid burning. If you find your crust too crumbly, you can add a bit more melted butter to help it bind together better.
- Experiment with different flavors of extract in your condensed milk, such as almond or coconut, for unique twists on the recipe.
- Consider using other types of crackers or cookies for the crust to change up the flavor and texture. Consider gluten-free options for guests with dietary restrictions.
Heat Control
When baking the crust, it’s crucial to keep an eye on the temperature and timing. The ideal temperature is 350°F, and the crust should be baked for 8-10 minutes. Signs of doneness include a lightly browned color and a firm texture to the touch. Avoid overbaking, as this can make! the crust too hard and brittle.
Crunch Factor
The crunch factor in these bars comes from the graham cracker crust and the candies on top. To achieve the perfect crunch, ensure your crust is baked until it’s lightly browned and firm. For the toppings, choose candies that provide a good texture contrast, like crunchy peanut butter cups or crispy M&M’s. This balance of textures adds to the magic of these bars, making each bite a delightful surprise.
Pro Kitchen Tricks
- For easier cutting, refrigerate the bars for about 30 minutes before slicing. This will help the condensed milk set further and make the bars less messy to cut.
- Use a sharp knife to cut the bars, and consider dipping the knife in hot water and wiping it clean between cuts for smoother, cleaner edges.
- Experiment with layering different ingredients before the candy topping for added textures and flavors. Nuts, dried fruits, or even a layer of melted chocolate can add exciting dimensions to your magic bars.
Storage Tips
- Store the bars in an airtight container in the refrigerator for up to 5 days. Let them come to room temperature before serving for the best flavor and texture.
- For longer storage, consider freezing the bars. Cut them first, then place the bars on a baking sheet lined with parchment paper and put it in the freezer until they’re frozen solid. Transfer the frozen bars to a freezer-safe bag or container for storage. They can be frozen for up to 2 months.
- When reheating frozen bars, simply leave them at room temperature for a few hours or refrigerate overnight. You can also warm them slightly in the microwave, but be cautious not to melt the candies.
Gift Packaging Ideas
These magic bars are perfect for gifting, especially during Easter. Consider packaging them in decorative tins, Easter-themed jars, or even plastic containers wrapped in colorful paper or foil. Adding a ribbon or a gift tag with a personalized message can make the gift even more special. For a more rustic look, wrap individual bars in cellophane bags and tie the top with a twine or a small Easter-themed pick. Whatever method you choose, the recipient is sure to appreciate the thought and deliciousness behind your Homemade Easter Magic Bars.
Flavor Variations
- Different spices: Add a pinch of cinnamon, nutmeg, or cardamom to the crust or the condensed milk for a unique flavor twist.
- Creative toppings: Beyond Easter candies, consider using chopped nuts, dried fruits, or even candy pieces like peanut butter cups or chopped candy canes for a Christmas version.
- Ingredient swaps: For a gluten-free version, use gluten-free crackers. You can also experiment with different types of milk or creamy substances for the filling, though this may alter the texture and flavor significantly.
Troubleshooting
- Texture problems: If your crust is too crumbly, it may not have enough butter. If the filling is too runny, it might not have been refrigerated long enough.
- Ingredient replacements: Always consider the flavor and texture you’re replacing when substituting ingredients. For example, swapping sweetened condensed milk with another creamy substance might require adjustments in sugar content or flavor enhancers.
- Over/undercooking signs: For the crust, overbaking will result in a dark brown, hard crust, while underbaking might leave it soft and crumbly. Ensure you bake it until it’s lightly browned and firm to the touch.
FAQs
- Can I freeze it? Yes, you can freeze the bars for up to 2 months. It’s best to freeze them after cutting, then store them in a freezer-safe bag or container.
- Is it gluten-free? The original recipe uses graham crackers, which contain gluten. However, you can easily make a gluten-free version by substituting the graham crackers with a gluten-free alternative.
- Can I double the recipe? Absolutely! Simply double all the ingredients and use a larger baking dish. Keep in mind that you might need to adjust the baking time for the crust slightly, so keep an eye on it to avoid overbaking.
Conclusion
Creating the Homemade Easter Magic Bars is a journey of fun and creativity, perfect for the Easter season. With their ease of preparation, impressive presentation, and delicious taste, these bars are sure to become a new family tradition. Don’t be afraid to experiment with different ingredients and toppings to make the recipe your own, and enjoy the process of sharing your creations with loved ones. Whether you’re a fan of sweet treats, festive desserts, or just looking for something magical to add to your Easter celebrations, the Homemade Easter Magic Bars Recipe has something for everyone. So go ahead, get creative, and make this Easter a little more magical, one delicious bar at a time.