Craving a decadent dessert to satisfy your sweet tooth? This easy homemade caramel butter cake with rich fudgy chocolate frosting is a family favorite, made with simple ingredients and perfect for a quick weeknight treat, save for later and indulge in its goodness.
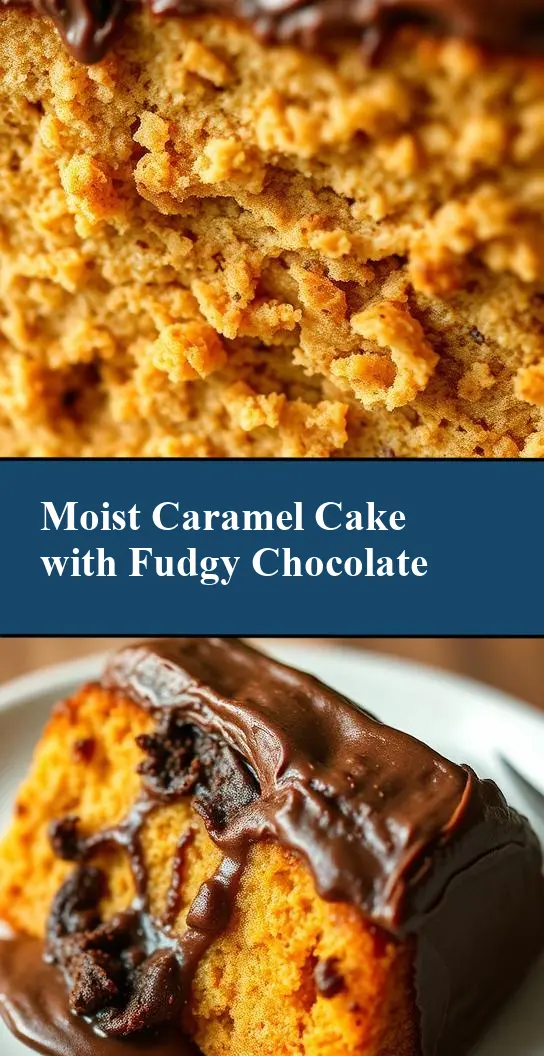
Caramel Butter Cake with Fudgy Chocolate Frosting
Introduction
Imagine a moist and decadent cake that combines the richness of caramel with the depth of fudgy chocolate frosting, all made with everyday ingredients that you might already have in your pantry. This Caramel Butter Cake with Fudgy Chocolate Frosting is not just a treat for the taste buds but also a testament to the magic that happens when simple ingredients come together in perfect harmony. Whether you’re a seasoned baker or just starting out, this recipe is designed to be easy to follow, requiring minimal effort for a result that’s sure to impress. The best part? It’s incredibly versatile, allowing you to express your creativity through various substitutions and additions, making it a perfect canvas for your culinary artistry.
Why This Works
- Flavor balance and ingredient accessibility: The combination of caramel and fudgy chocolate offers a balanced and rich flavor profile that is both comforting and indulgent. The ingredients are easily accessible, making this a practical choice for any occasion.
- Ease of preparation: Despite its impressive outcome, the cake and frosting are surprisingly easy to prepare. The steps are straightforward, and the ingredients are mixed in a way that ensures a smooth and even texture throughout.
- Impressive results with minimal effort: One of the standout features of this recipe is how it manages to deliver such an impressive and professional-looking result with relatively minimal effort. This makes it perfect for special occasions or as a centerpiece for any gathering.
Key Ingredients
The foundation of this cake lies in its key ingredients: high-quality butter for the cake, which provides moisture and flavor; caramel sauce, which adds a deep, sweet note; and for the frosting, dark chocolate for its intense flavor and heavy cream for its creamy texture. Practical substitutions can include using margarine instead of butter for a dairy-free option, or opting for a lighter chocolate if you prefer a less intense chocolate flavor. The caramel can also be homemade or store-bought, depending on your preference and the time you have available.
Instructions
- Step 1: Begin by preheating your oven to 350°F (180°C). Prepare your cake pans by greasing them lightly and dusting them with flour. In a large mixing bowl, cream together the butter and sugar until light and fluffy. Beat in the eggs one at a time, ensuring each egg is fully incorporated before adding the next. Gradually mix in the flour, alternating with the caramel sauce, beginning and ending with the flour. Beat just until combined, being careful not to overmix.
- Step 2: Pour the batter evenly into the prepared pans and smooth the tops. Bake for approximately 25-30 minutes, or until a toothpick inserted into the center comes out clean. Allow the cakes to cool in the pans for 5 minutes before transferring them to a wire rack to cool completely.
- Step 3: For the frosting, melt the chocolate in a double boiler or in the microwave in 30-second increments, stirring between each interval until smooth. Remove from the heat and whip in the heavy cream until the mixture is light and airy. This step requires patience, as the frosting needs to cool slightly to achieve the perfect consistency for spreading.
- Step 4: Once the cakes are completely cool, you can assemble the cake. Place one layer on a serving plate and spread a generous amount of frosting on top. Place the second layer on top and frost the entire cake with the remaining frosting. Decorate as desired, with options ranging from a simple sprinkle of sea salt to more elaborate designs using melted chocolate or caramel drizzle.
Handy Tips
- To ensure the cake layers are even, try to divide the batter as evenly as possible between the two pans. Also, don’t overmix the batter, as this can lead to a dense cake. For the frosting, make sure the chocolate is completely melted and the cream is whipped to the right consistency to achieve a smooth, spreadable frosting.
Heat Control
When baking the cake, it’s crucial to maintain the right temperature. An oven that’s too hot can lead to the outside burning before the inside is fully cooked, while an oven that’s too cool can result in a cake that’s undercooked or soggy. Keep an eye on the cakes after the 20-minute mark, as oven times can vary. The cakes are done when they’re lightly golden on top and a toothpick inserted into the center comes out clean.
Crunch Factor
This cake is designed to be moist and tender, with the fudgy chocolate frosting adding a rich and creamy element. If you’re looking to add a crunch factor, consider sprinkling chopped nuts or sea salt on top of the frosting before it sets. This adds a delightful textural contrast to the smoothness of the cake and frosting.
Pro Kitchen Tricks
- For a more intense caramel flavor, drizzle a small amount of caramel sauce on top of the cake layers before frosting. This adds an extra layer of flavor and can help keep the cake moist. Additionally, using room temperature ingredients can significantly improve the texture and consistency of both the cake and the frosting.
Storage Tips
- The cake can be stored at room temperature for up to 3 days, covered tightly with plastic wrap or aluminum foil. For longer storage, consider refrigerating the cake, which can extend its freshness up to 5 days. If you choose to freeze the cake, it’s best to do so without the frosting. Wrap the cake layers tightly in plastic wrap and then in aluminum foil, labeling and dating the package. Frozen cake layers can be stored for up to 2 months. Thaw frozen layers overnight in the refrigerator before frosting and serving.
Gift Packaging Ideas
This cake makes a wonderful gift, especially for special occasions like birthdays or anniversaries. Consider packaging the cake in a decorative cake box or wrapping it beautifully in cellophane and tying it with a ribbon. For a more rustic look, you could place the cake on a wooden board or a decorative plate and wrap it in a linen cloth, securing it with twine. Don’t forget to include a personalized note or card to make the gift even more special.
Flavor Variations
- 🌟 Different spices: Adding a pinch of salt or a teaspoon of vanilla extract can enhance the flavor of the cake. For a seasonal twist, consider adding cinnamon or nutmeg for a winter-themed cake.
- 🌟 Creative toppings: Besides nuts or sea salt, you could top your cake with fresh fruits, caramelized bananas, or even candy pieces for a fun and playful look.
- 🌟 Ingredient swaps: For a gluten-free version, substitute the all-purpose flour with a gluten-free flour blend. You can also experiment with different types of sugar or honey for a slightly different flavor profile.
Troubleshooting
- Texture problems: If your cake turns out too dense, it might be due to overmixing the batter. If it’s too dry, it could be overbaked. Adjust your mixing and baking times accordingly for better results.
- Ingredient replacements: Always try to use the ingredients called for in the recipe for the best results. However, if you need to make substitutions, do so thoughtfully, considering how the replacement might affect the final product’s flavor and texture.
- Over/undercooking signs: Keep an eye on your cake while it’s baking. If the edges start to brown too quickly, cover the top with foil to prevent overbrowning. A toothpick inserted into the center should come out clean; if it doesn’t, give the cake a few more minutes and check again.
FAQs
- Can I freeze it? Yes, you can freeze the cake layers for up to 2 months. It’s recommended to freeze without the frosting and thaw overnight in the refrigerator before serving.
- Is it gluten-free? The original recipe includes gluten due to the all-purpose flour. However, you can make a gluten-free version by substituting the flour with a gluten-free flour blend.
- Can I double the recipe? Yes, you can double the recipe to make a larger cake. Just ensure you have enough pans and adjust the baking time as needed, keeping a close eye on the cakes to prevent overcooking.
Conclusion
Creating the Caramel Butter Cake with Fudgy Chocolate Frosting is a journey that combines simplicity with sophistication, resulting in a dessert that’s sure to delight both kids and adults alike. Whether you’re celebrating a special occasion or just want to treat your family to something extraordinary, this cake is the perfect choice. Don’t be afraid to experiment with the recipe, adding your own twist or flair to make it truly unique. And remember, the joy of baking isn’t just about the end result; it’s about the process, the love, and the care you put into every step. So go ahead, get baking, and share your creations with the world!