Craving something decadent? Indulge in these easy homemade dark chocolate truffles made with rich cocoa and creamy heavy cream, perfect for a quick weeknight treat, save for later
Dark Chocolate Truffles
Introduction
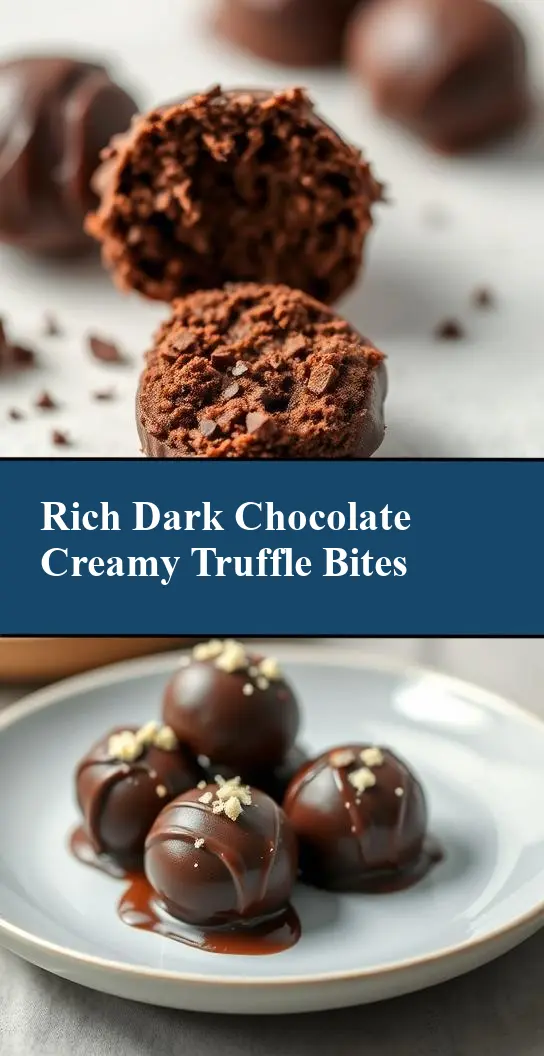
Indulge in the rich, velvety world of dark chocolate truffles, where the simplicity of everyday ingredients meets the elegance of fine dessert-making. With just a few quality components, you can create a treat that’s as impressive as it is delicious. The beauty of dark chocolate truffles lies not only in their deep, satisfying flavor but also in the endless creativity they allow. Whether you’re a seasoned chocolatier or a beginner in the kitchen, these truffles offer a versatile canvas for experimentation and personalization, making them perfect for special occasions or as a thoughtful gift.
Why This Works
- Flavor balance and ingredient accessibility: The combination of dark chocolate and cream provides a profound flavor base that’s easily accessible and requires minimal ingredients.
- Ease of preparation: Despite their luxurious appeal, dark chocolate truffles are surprisingly easy to make, requiring no baking and minimal cooking.
- Impressive results with minimal effort: The process of rolling and coating the truffles allows for a high level of customization, ensuring that each piece looks as good as it tastes, with very little effort.
Key Ingredients
The foundation of exceptional dark chocolate truffles begins with high-quality ingredients. You will need dark chocolate with a high cocoa content (at least 70%) for the best flavor, heavy cream for the ganache, and unsalted butter for added richness. Optional ingredients for coating include cocoa powder, confectioners’ sugar, and chopped nuts. For practical substitutions, consider using coconut cream for a dairy-free alternative or different types of chocolate for varying flavor profiles.
Instructions
- Step 1: Begin by chopping the dark chocolate into small pieces and placing them in a double boiler or a heatproof bowl set over a pot of simmering water. Ensure the water does not touch the bottom of the bowl.
- Step 2: In a small saucepan, heat the heavy cream over low heat until it starts to simmer. Remove from heat and pour over the chopped chocolate. Let it sit for a minute before stirring until the mixture is smooth and glossy. Add the unsalted butter and stir until fully incorporated.
- Step 3: Allow the chocolate mixture to cool to room temperature, then cover and refrigerate for at least 2 hours or overnight. Once set, use a melon baller or a spoon to scoop out small portions of the chocolate mixture. Roll each portion between your hands to form a smooth ball.
- Step 4: For the final touches, roll each truffle in your chosen coating, whether it be cocoa powder, confectioners’ sugar, or chopped nuts, to add texture and visual appeal. Place the coated truffles on a baking sheet lined with parchment paper and refrigerate for at least 30 minutes to set.
Handy Tips
- Work with high-quality chocolate for the best flavor. Avoid using chocolate with low cocoa content as it may result in a less intense chocolate experience.
- Keep your hands cold when rolling the truffles to prevent the chocolate from melting. You can even wet your hands slightly to help the truffles retain their shape.
- Experiment with different coatings and toppings to find your favorite. This could include anything from toasted coconut flakes to crushed candy pieces.
Heat Control
When heating the cream, it’s essential to do so gently to prevent it from boiling over or scorching. Low heat and constant monitoring are key. Similarly, when melting the chocolate, using a double boiler or a water bath helps maintain a safe temperature, ensuring the chocolate melts smoothly without seizing up.
Crunch Factor
The desired texture of dark chocolate truffles is typically smooth on the inside and varied on the outside, depending on the coating. For a crunchy exterior, chopped nuts or cookie crumbs work well. For a softer coating, cocoa powder or confectioners’ sugar can be used. The texture of the truffle itself should be firm but yielding to the bite, indicating that it has been chilled sufficiently.
Pro Kitchen Tricks
- Use a thermometer to ensure your chocolate is at the ideal working temperature. This is especially crucial if you’re tempering the chocolate for a glossy finish.
- For an added layer of flavor, infuse your heavy cream with a spice, herb, or liqueur before mixing it with the chocolate.
- Keep truffles fresh by storing them in an airtight container in the refrigerator. Let them come to room temperature before serving for the best taste and texture.
Storage Tips
- Store truffles in an airtight container in the refrigerator for up to 2 weeks.
- For longer storage, consider freezing the truffles. Place them in a single layer in an airtight container or freezer bag and store in the freezer for up to 2 months. Thaw frozen truffles in the refrigerator overnight.
- When storing, it’s best to keep the truffles away from strong-smelling foods as they can absorb odors easily.
Gift Packaging Ideas
Dark chocolate truffles make exquisite gifts, especially when beautifully packaged. Consider placing the truffles in decorative tins, gift boxes, or jars. Wrap each truffle individually in colored foil or paper for an added touch. Finish the gift with a ribbon or a gift tag, and include a personal message for a thoughtful gesture. For a more rustic look, use parchment paper or a paper bag and tie with twine.
Flavor Variations
- 🌟 Different spices: Add a pinch of salt, a grind of pepper, or a sprinkle of cinnamon to the chocolate mixture for unique flavor dimensions.
- 🌟 Creative toppings: Experiment with various nuts, seeds, or even dried fruits to coat your truffles, offering a range of textures and flavors.
- 🌟 Ingredient swaps: Replace heavy cream with a non-dairy milk or use different types of chocolate to cater to various tastes and dietary needs.
Troubleshooting
- Texture problems: If your truffles are too soft, they may not have been chilled enough. If they’re too hard, the chocolate might have been overheated or overworked.
- Ingredient replacements: When substituting ingredients, ensure that the replacements have similar properties to maintain the balance of the truffle. For example, if using a non-dairy cream, choose one that whipping well to mimic the heavy cream’s texture.
- Over/undercooking signs: Since these truffles don’t require baking, the primary concern is the melting and cooling process. Ensure the chocolate is melted smoothly and the mixture is cooled sufficiently to achieve the right consistency.
FAQs
- Can I freeze it? Yes, dark chocolate truffles can be frozen for up to 2 months. Simply thaw them in the refrigerator when you’re ready to serve.
- Is it gluten-free? The basic recipe for dark chocolate truffles is gluten-free, making it a great option for those with gluten intolerance. However, always check the ingredients of your chocolate and any added coatings to ensure they are gluten-free.
- Can I double the recipe? Yes, you can easily double or triple the recipe to make more truffles. Just ensure you have enough space in your refrigerator for the mixture to chill and set properly.
Conclusion
Making dark chocolate truffles is a journey of discovery, allowing you to explore the depths of chocolate and the simplicity of creating something truly decadent with minimal ingredients. Whether you’re making them for yourself, as a gift, or for a special occasion, these truffles are sure to impress. Don’t be afraid to experiment and make the recipe your own, and remember, the most important ingredient in any recipe is the love and care you put into making it.