Can you resist the charm of sweet banana bread and cinnamon rolls combined. This easy homemade treat features ripe bananas and a quick cinnamon swirl, perfect for a weeknight dinner dessert. Save for later and indulge in this family favorite recipe tonight.
Banana Bread Cinnamon Rolls
Introduction
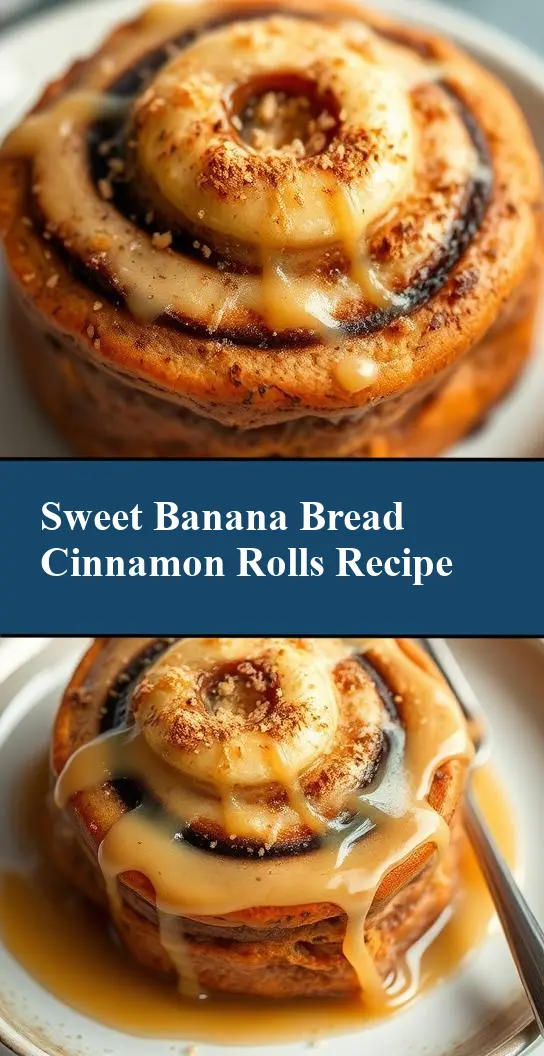
Imagine a delicious fusion of moist banana bread and sweet, sticky cinnamon rolls, all wrapped up in a treat that’s as easy to make as it is to devour. This creative recipe for Banana Bread Cinnamon Rolls brings together the comforting flavors of ripe bananas, cinnamon, and a hint of nutmeg, all in a soft, fluffy pastry that’s perfect for breakfast, brunch, or as a sweet snack. The best part? It’s made with everyday ingredients and requires minimal effort, making it a great way to get creative in the kitchen without breaking a sweat. Whether you’re a seasoned baker or just starting out, this recipe is sure to impress with its ease, flavor, and sheer deliciousness.
Why This Works
- Flavor balance and ingredient accessibility: The combination of banana, cinnamon, and nutmeg creates a warm, inviting aroma and taste that’s hard to resist, and all the ingredients are easily found in most supermarkets.
- Ease of preparation: Despite the impressive results, this recipe is surprisingly straightforward, requiring just a few simple steps and minimal specialized equipment.
- Impressive results with minimal effort: The end result is a beautifully swirled, golden-brown pastry that looks and tastes like it came from a professional bakery, but can be achieved with just a little patience and practice.
Key Ingredients
The star of the show in this recipe is, of course, the ripe bananas, which add natural sweetness and moisture to the dough. You’ll also need some basic pantry staples like flour, sugar, and yeast, as well as some warm spices like cinnamon and nutmeg to give the rolls their distinctive flavor. For the filling, you’ll need some brown sugar, butter, and cinnamon, which combine to create a rich, sticky paste that’s the perfect complement to the soft, fluffy dough. If you’re looking for substitutions, you can try using other types of sugar or spice to create different flavor profiles, or even adding in some chopped nuts or dried fruit to add texture and interest.
Instructions
- Step 1: Begin by prepping your ingredients, including mashing the ripe bananas in a bowl and mixing together the dry ingredients like flour, sugar, and yeast in a separate bowl. Make sure to activate the yeast by adding warm water and letting it sit for a few minutes until it becomes frothy and bubbly.
- Step 2: Combine the wet and dry ingredients, then knead the dough for a few minutes until it becomes smooth and elastic. Place the dough in a greased bowl, cover it with a damp cloth, and let it rise in a warm place for about an hour, or until it’s doubled in size.
- Step 3: Once the dough has risen, punch it down and roll it out into a large rectangle. Mix together the filling ingredients, including brown sugar, butter, and cinnamon, and spread the mixture evenly over the dough, leaving a small border around the edges. Roll the dough up tightly, then cut it into individual rolls and place them in a greased baking dish.
- Step 4: Let the rolls rise for another 30 minutes or so, then bake them in a preheated oven until they’re golden brown and cooked through. While the rolls are baking, mix together a glaze made from powdered sugar and milk, and brush it over the rolls as soon as they come out of the oven.
Handy Tips
- Make sure to use ripe bananas for the best flavor and texture, as they’ll be sweeter and softer than unripe bananas.
- If you’re having trouble getting the yeast to activate, try using warmer water or checking the expiration date on the yeast package.
- To add some extra flavor and texture to the rolls, try sprinkling some chopped nuts or dried fruit over the filling before rolling up the dough.
Heat Control
When it comes to baking the rolls, it’s all about finding the right temperature and timing to get a perfectly cooked, golden-brown pastry. Preheat your oven to 375°F (190°C), and bake the rolls for about 20-25 minutes, or until they’re cooked through and lightly browned on top. You can check for doneness by inserting a toothpick into the center of a roll – if it comes out clean, the rolls are done. If not, give them a few more minutes and check again.
Crunch Factor
The texture of these rolls is all about contrast, with a soft, fluffy interior giving way to a crunchy, caramelized exterior. To achieve this, make sure to bake the rolls until they’re nicely browned on top, and consider adding some chopped nuts or seeds to the filling for extra texture and crunch.
Pro Kitchen Tricks
- To get a perfectly swirled, marbled effect on top of the rolls, try using a sharp knife or pastry brush to create a series of shallow cuts or swirls in the dough before baking.
- For an extra-golden glaze, try adding a little bit of honey or maple syrup to the powdered sugar and milk mixture, and brush it over the rolls while they’re still warm from the oven.
- To make cleanup easier, try lining the baking dish with parchment paper or a silicone mat before adding the rolls, and consider using a pastry brush to apply the glaze instead of a knife or spatula.
Storage Tips
- To keep the rolls fresh for as long as possible, store them in an airtight container at room temperature for up to 3 days, or wrap them individually in plastic wrap or aluminum foil and freeze for up to 2 months.
- To reheat frozen rolls, simply thaw them overnight in the fridge or at room temperature for a few hours, then bake in a preheated oven at 350°F (180°C) for about 10-15 minutes, or until warmed through.
- For the best results, try to consume the rolls within a day or two of baking, as they’ll be at their freshest and most flavorful during this time.
Gift Packaging Ideas
These rolls are perfect for gifting to friends and family, and can be packaged in a variety of creative ways to make them look and feel special. Try wrapping individual rolls in plastic wrap or aluminum foil, then placing them in a decorative tin or basket filled with other sweet treats like candies or cookies. You could also package the rolls in a cute paper bag or container, and add a personalized note or gift tag to make it extra-special.
Flavor Variations
- 🌟 Different spices: Try adding a pinch of nutmeg or cardamom to the dough for a unique and aromatic flavor, or using different types of cinnamon or vanilla to create distinct flavor profiles.
- 🌟 Creative toppings: Consider adding some chopped nuts or seeds to the filling for extra texture and crunch, or using different types of sugar or honey to create a variety of flavor combinations.
- 🌟 Ingredient swaps: If you’re looking for a gluten-free or vegan version of the recipe, try substituting the flour with a gluten-free alternative or using a non-dairy milk and vegan butter substitute.
Troubleshooting
- Texture problems: If the rolls are coming out too dense or dry, try adding a little more yeast or sugar to the dough, or checking the expiration date on the yeast package to make sure it’s still active.
- Ingredient replacements: If you’re missing a key ingredient, try substituting it with something similar – for example, using all-purpose flour instead of bread flour, or substituting brown sugar with white sugar and a little bit of molasses.
- Over/undercooking signs: Keep an eye on the rolls while they’re baking, and check for doneness by inserting a toothpick into the center of a roll. If it comes out clean, the rolls are done – if not, give them a few more minutes and check again.
FAQs
- Can I freeze it? Yes, the rolls can be frozen for up to 2 months – simply wrap them individually in plastic wrap or aluminum foil and place in a freezer-safe bag or container.
- Is it gluten-free? No, this recipe contains gluten – however, you can try substituting the flour with a gluten-free alternative to create a gluten-free version.
- Can I double the recipe? Yes, the recipe can be easily doubled or tripled to make a larger batch of rolls – simply multiply the ingredients and follow the same instructions.
Conclusion
With these Banana Bread Cinnamon Rolls, you’ll be able to create a delicious, impressive treat that’s perfect for any occasion. Whether you’re a seasoned baker or just starting out, this recipe is sure to become a favorite – and with its ease, flavor, and creativity, it’s the perfect way to get started with baking or to try something new and exciting. So go ahead, give it a try, and enjoy the sweet, sticky goodness of these amazing rolls!