Looking for a sweet treat to delight your family? Try these easy homemade Sweet and Salty Teddy Bear Snickerdoodles made with cinnamon and sugar, perfect for a quick weeknight dessert, save for later
Sweet and Salty Teddy Bear Snickerdoodles
Introduction
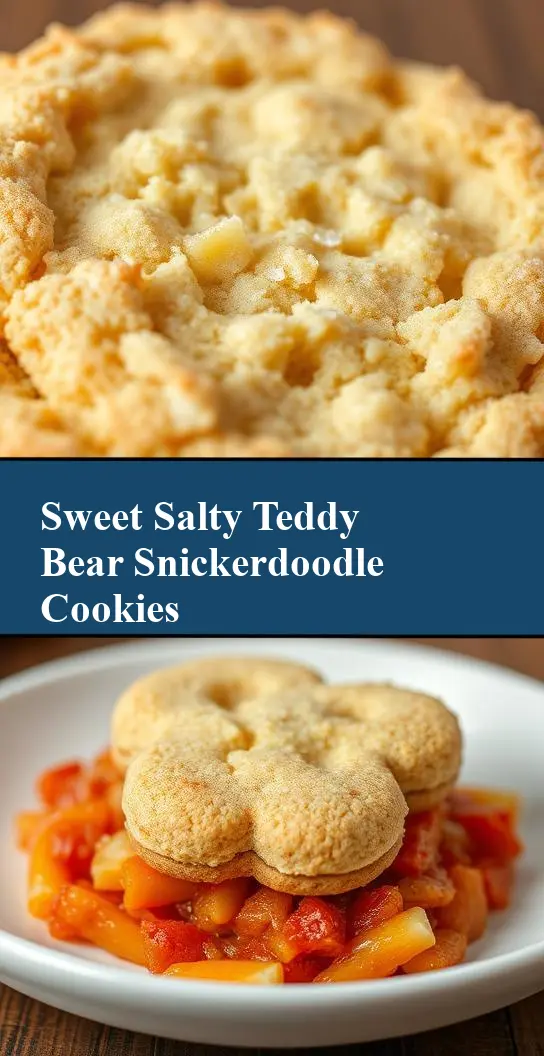
Imagine sinking your teeth into a soft, chewy cookie that’s bursting with sweet and salty flavors, all while being adorable enough to melt hearts. The Sweet and Salty Teddy Bear Snickerdoodles are not just a treat for kids; they’re a delightful surprise for anyone looking to indulge in a creative twist on classic snickerdoodles. Made with everyday ingredients and requiring minimal effort, these cookies are perfect for a quick dessert or a fun baking project with the family. The best part? They’re incredibly easy to make, requiring just a few ingredients and basic kitchen tools.
Why This Works
- Flavor balance and ingredient accessibility: The combination of sweet sugar and salty flavorings creates a unique taste experience that’s both familiar and exciting. Plus, all the ingredients are easily found in most grocery stores.
- Ease of preparation: The dough comes together quickly, and shaping the cookies into teddy bears is a fun, creative process that doesn’t require any special skills.
- Impressive results with minimal effort: Despite their cute appearance, these cookies are surprisingly simple to make. They’re perfect for impressing friends and family without spending hours in the kitchen.
Key Ingredients
The main ingredients for these Sweet and Salty Teddy Bear Snickerdoodles include butter, sugar, eggs, flour, cream of tartar, baking soda, and salt. For the sweet and salty flavor, you’ll also need cinnamon sugar and flaky sea salt. If you’re looking for substitutions, you can use margarine instead of butter and kosher salt instead of flaky sea salt. However, keep in mind that these substitutions might slightly alter the flavor and texture of your cookies.
Instructions
- Step 1: Begin by preheating your oven to 375°F (190°C). Line a baking sheet with parchment paper or a silicone mat. In a medium-sized bowl, whisk together the flour, cream of tartar, baking soda, and salt. Set aside.
- Step 2: In a large bowl, use an electric mixer to cream together the butter and sugar until light and fluffy. Beat in the eggs one at a time, making sure each egg is fully incorporated before adding the next. Gradually mix in the dry ingredients until a dough forms.
- Step 3: In a small bowl, mix together the cinnamon and sugar. Roll the dough into balls, about 1 1/2 inches in diameter. Then, roll each ball in the cinnamon sugar mixture to coat. Use your fingers or a toothpick to create the teddy bear features (eyes, nose, mouth) on each cookie. Place the cookies on the prepared baking sheet, leaving about 2 inches of space between each cookie.
- Step 4: Sprinkle the tops of the cookies with flaky sea salt. Bake for 10-12 minutes, or until the edges are set and the centers are just slightly soft. Remove the cookies from the oven and let them cool on the baking sheet for 5 minutes before transferring them to a wire rack to cool completely.
Handy Tips
- Make sure to not overbake the cookies, as this can make them hard and lose their chewy texture. If you’re unsure, it’s better to err on the side of underbaking.
- Use a variety of cinnamon sugars or flavorings to give your cookies a unique twist. For example, you could use pumpkin pie spice for a fall-themed cookie or nutmeg for an extra warm flavor.
- Avoid overmixing the dough, as this can lead to tough cookies. Stop mixing as soon as the ingredients come together in a cohesive ball.
Heat Control
For these cookies, it’s crucial to maintain the right oven temperature. If your oven tends to run hot or cold, consider investing in an oven thermometer to ensure you’re baking at the correct temperature. The ideal baking time is 10-12 minutes, but this can vary depending on your oven and the size of your cookies. Keep an eye on them after 8 minutes and remove them when they’re lightly golden around the edges and set in the center.
Crunch Factor
The crunch factor in these cookies comes from the cinnamon sugar coating and the flaky sea salt on top. To achieve the perfect crunch, make sure to not overbake the cookies, as this can make them hard and lose their texture. Also, don’t skip the step of rolling the cookies in cinnamon sugar, as this adds a delightful crunch and flavor to the exterior.
Pro Kitchen Tricks
- For an extra crispy exterior and chewy interior, try chilling the dough for 30 minutes before baking. This will help the cookies retain their shape and bake up with a better texture.
- Use a cookie scoop to portion out the dough, ensuring that all your cookies are the same size and bake evenly.
- Experiment with different types of sugar, like brown sugar or turbinado sugar, to add deeper flavors to your cookies.
Storage Tips
- Store the cookies in an airtight container at room temperature for up to 5 days. If you live in a humid climate, consider storing them in the refrigerator to keep them fresh for longer.
- To freeze the cookies, place them in a single layer in a freezer-safe bag or container. They can be frozen for up to 2 months. When you’re ready to serve, simply thaw at room temperature or reheat in the microwave for a few seconds.
- Consider using glass containers with tight-fitting lids to store your cookies, as these will keep them fresh and protected from moisture and other flavors in your pantry.
Gift Packaging Ideas
These Sweet and Salty Teddy Bear Snickerdoodles are perfect for gifting, especially during holidays or special occasions. Consider packaging them in cute jars or containers with a ribbon and a gift tag. You could also wrap them individually in plastic wrap or cellophane bags and tie with a twist tie or a piece of twine. For a more elaborate gift, create a cookie basket filled with a variety of your favorite treats, including these adorable teddy bear snickerdoodles.
Flavor Variations
- 🌟 Different spices: Try adding a pinch of nutmeg, cardamom, or ginger to the dough for a unique flavor twist.
- 🌟 Creative toppings: Instead of using flaky sea salt, try topping your cookies with chopped nuts, shredded coconut, or even candy pieces for added texture and flavor.
- 🌟 Ingredient swaps: Substitute the butter with coconut oil or use gluten-free flour to make the cookies more accessible to those with dietary restrictions.
Troubleshooting
- Texture problems: If your cookies turn out too hard, it might be because you overbaked them. Try reducing the baking time or checking on them more frequently. If they’re too soft, you might have underbaked them or used too much butter.
- Ingredient replacements: If you’re missing an ingredient, don’t be afraid to get creative with substitutions. Just remember that substituting ingredients can affect the final flavor and texture of your cookies.
- Over/undercooking signs: Keep an eye on your cookies while they’re baking. If they’re lightly golden around the edges and set in the center, they’re done. If they’re pale and soft, they need more time. If they’re dark brown and hard, they’re overcooked.
FAQs
- Can I freeze it? Yes, you can freeze the dough or the baked cookies. Simply place them in a freezer-safe bag or container and store in the freezer for up to 2 months.
- Is it gluten-free? The original recipe uses all-purpose flour, which contains gluten. However, you can easily make these cookies gluten-free by substituting the flour with a gluten-free alternative.
- Can I double the recipe? Yes, you can double or even triple the recipe if you need to make a large batch of cookies. Just keep in mind that you might need to adjust the baking time slightly if you’re making a larger batch.
Conclusion
With their adorable teddy bear shape and delicious sweet and salty flavor, these snickerdoodles are sure to become a favorite in your household. Whether you’re baking for a special occasion or just a quick dessert, these cookies are perfect for anyone looking to add a little fun and creativity to their baking. So go ahead, get baking, and don’t be afraid to experiment with different flavors and toppings to make these cookies your own. Happy baking!