Need a quick dessert fix? Try these easy blueberry pie bars made with fresh blueberries and a homemade crust, perfect for a weeknight dinner or family favorite treat, save for later
Easy Blueberry Pie Bars
Introduction
Imagine a dessert that combines the warmth of a homemade pie with the convenience of a bar dessert, all while showcasing the succulent flavor of blueberries. The Easy Blueberry Pie Bars recipe is a masterclass in simplicity and flavor, perfect for those looking to impress without spending hours in the kitchen. Using everyday ingredients and requiring minimal effort, these bars are not only a delight to the taste buds but also a testament to the creativity that can be achieved with accessible ingredients. Whether you’re a seasoned baker or just starting out, this recipe is sure to become a favorite, offering a delicious blend of blueberry goodness, a crumbly crust, and the ease of a bar dessert that’s perfect for any occasion.
Why This Works
- Flavor balance and ingredient accessibility: The combination of fresh blueberries, sugar, and a hint of lemon zest creates a flavor profile that’s both tangy and sweet, while the crust, made from common pantry staples like flour, sugar, and butter, adds a satisfying crunch.
- Ease of preparation: The bars require minimal preparation, with a simple crust mixture that doesn’t need to be rolled out and a filling that’s essentially a matter of mixing a few ingredients together.
- Impressive results with minimal effort: Despite the simplicity of the recipe, the end result is a dessert that looks and tastes like it came from a professional bakery, making it perfect for potlucks, family gatherings, or as a sweet treat to brighten up any day.
Key Ingredients
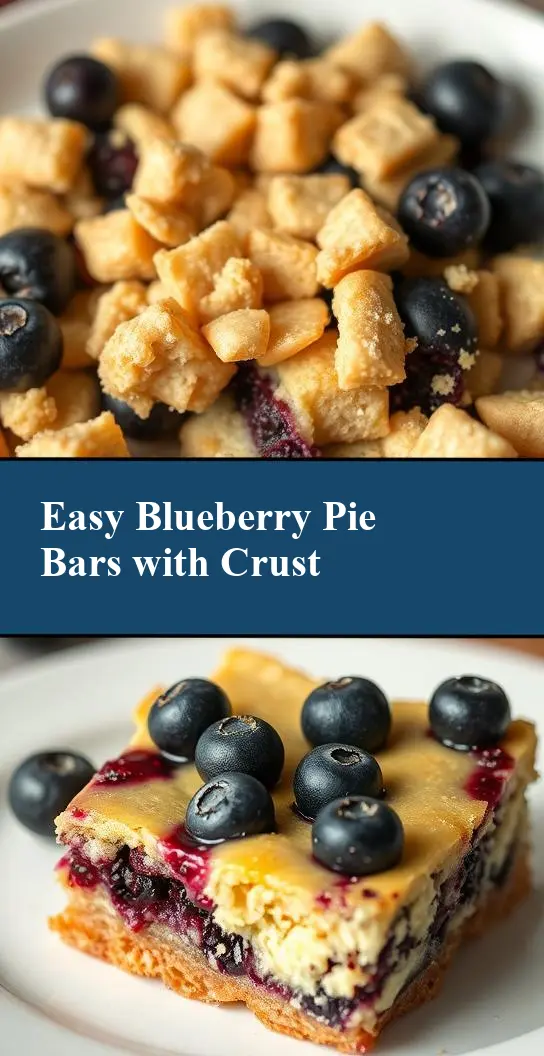
The Easy Blueberry Pie Bars rely on a few key ingredients to achieve their signature flavor and texture. For the crust, you’ll need all-purpose flour, granulated sugar, and cold butter. The filling is where the magic happens, with fresh or frozen blueberries being the star of the show, supported by granulated sugar, cornstarch, lemon zest, and lemon juice. Practical substitutions can be made for some ingredients; for example, if you don’t have fresh blueberries, frozen ones work just as well, and you can adjust the amount of sugar to your taste. Additionally, using a mixture of white and brown sugar can add a deeper flavor to the crust.
Instructions
- Step 1: Begin by preheating your oven to 375°F (190°C). While that’s heating up, prepare your crust by mixing together 2 cups of flour, 1/2 cup of granulated sugar, and 1/2 cup of cold butter until the mixture resembles coarse crumbs. Press this mixture into a 9×9 inch baking dish lined with parchment paper.
- Step 2: Bake the crust for about 20 minutes, or until it’s lightly golden. While the crust is baking, mix together 2 cups of blueberries, 1/2 cup of granulated sugar, 2 tablespoons of cornstarch, 1 tablespoon of lemon zest, and 2 tablespoons of lemon juice in a bowl until the blueberries are evenly coated.
- Step 3: Once the crust is ready, pour the blueberry mixture over it and spread it out evenly. Then, prepare the topping by mixing 1/2 cup of flour, 1/2 cup of granulated sugar, and 1/4 cup of cold butter until crumbly. Spread this topping over the blueberry layer.
- Step 4: Return the dish to the oven and bake for an additional 40-45 minutes, or until the topping is golden brown and the filling is bubbly. Let the bars cool completely in the pan before cutting into them and serving.
Handy Tips
- One of the most helpful tips for making these bars is to not overmix the crust or the topping, as this can lead to a tough texture. Also, make sure to press the crust evenly into the baking dish to ensure it cooks uniformly. If using frozen blueberries, thaw them first and pat dry with a paper towel to remove excess moisture.
Heat Control
Heat control is crucial in this recipe, as both the crust and the filling need to be cooked to the right doneness. For the crust, you’re looking for a light golden color, which should take about 20 minutes. The filling and topping will take longer, about 40-45 minutes, and you’ll know they’re done when the topping is golden brown and the filling is bubbly. Keep an eye on the bars during the last 10 minutes of baking, as the topping can quickly go from perfectly golden to burnt.
Crunch Factor
The crunch factor in these bars comes from the crust and the topping, both of which should have a nice texture contrast to the soft, fruity filling. To achieve this, make sure the butter is cold when you mix it with the flour and sugar for both the crust and the topping, as this will help create a flaky, crumbly texture. Also, don’t overbake, as this can make the bars too hard.
Pro Kitchen Tricks
- One expert tip for these bars is to use a combination of white and brown sugar in the crust for a deeper flavor. Another trick is to not overwork the dough, which can make it tough. For cleanup, lining the baking dish with parchment paper makes removing the bars and cleaning up afterwards much easier.
Storage Tips
- These bars are best stored in an airtight container at room temperature for up to 3 days. They can also be refrigerated for up to 5 days or frozen for up to 2 months. If freezing, it’s best to cut the bars first and then freeze them, as this makes it easier to thaw and serve only what you need. To reheat, simply thaw at room temperature or reheat in the microwave or oven until warmed through.
Gift Packaging Ideas
These bars are perfect for gifting, especially during the holidays or for potlucks. Consider packaging them in decorative tins or jars, or wrapping them individually in plastic wrap or aluminum foil and placing them in a gift basket. A ribbon or a gift tag with a personal message adds a thoughtful touch. If you’re feeling extra crafty, you could even make a batch of these bars in a disposable aluminum pan, perfect for giving to a friend or neighbor without worrying about getting your dish back.
Flavor Variations
- 🌟 Different spices: Try adding a pinch of cinnamon or nutmeg to the crust or filling for an extra layer of flavor.
- 🌟 Creative toppings: Instead of the traditional crumb topping, consider using chopped nuts, oatmeal, or even a drizzle of chocolate for a different twist.
- 🌟 Ingredient swaps: If blueberries aren’t your favorite, you can easily substitute them with raspberries, blackberries, or any other berry that suits your taste. Just adjust the amount of sugar according to the sweetness of the berries you choose.
Troubleshooting
- Texture problems: If your bars turn out too hard, it might be because they were overbaked. If they’re too soft, it could be due to underbaking. Adjust your baking time accordingly for the next batch.
- Ingredient replacements: If you don’t have certain ingredients, like lemon zest, you can omit them or substitute with something similar. However, keep in mind that this might affect the overall flavor of the bars.
- Over/undercooking signs: Keep an eye on your bars during the baking time. If the topping starts to brown too quickly, you can cover the dish with foil to prevent burning. If the filling isn’t bubbly after the recommended baking time, give it a few more minutes and check again.
FAQs
- Can I freeze it? Yes, these bars can be frozen for up to 2 months. It’s best to cut them first and then freeze them individually for easier thawing and serving.
- Is it gluten-free? The traditional recipe includes wheat flour, making it not gluten-free. However, you can experiment with gluten-free flour mixes to adapt the recipe for gluten-free diets.
- Can I double the recipe? Yes, you can easily double the recipe if you need more bars. Just keep in mind that you’ll need to adjust the baking time slightly, as the thicker layers may take a bit longer to cook through.
Conclusion
The Easy Blueberry Pie Bars are a true delight, offering a perfect balance of flavors and textures that’s sure to please anyone who tries them. With their ease of preparation, impressive presentation, and versatility in terms of ingredient substitutions and flavor variations, these bars are a must-try for anyone looking to add a new dessert to their repertoire. Whether you’re baking for a crowd or just looking for a sweet treat to enjoy on your own, these bars are sure to become a favorite. So go ahead, get creative, and enjoy the process of making something truly special with everyday ingredients.