Looking for a dessert to impress your family? This easy Orange Creamsicle Cake is a homemade favorite made with fresh oranges and a moist creamy frosting, perfect for a weeknight treat, save for later
Orange Creamsicle Cake
Introduction
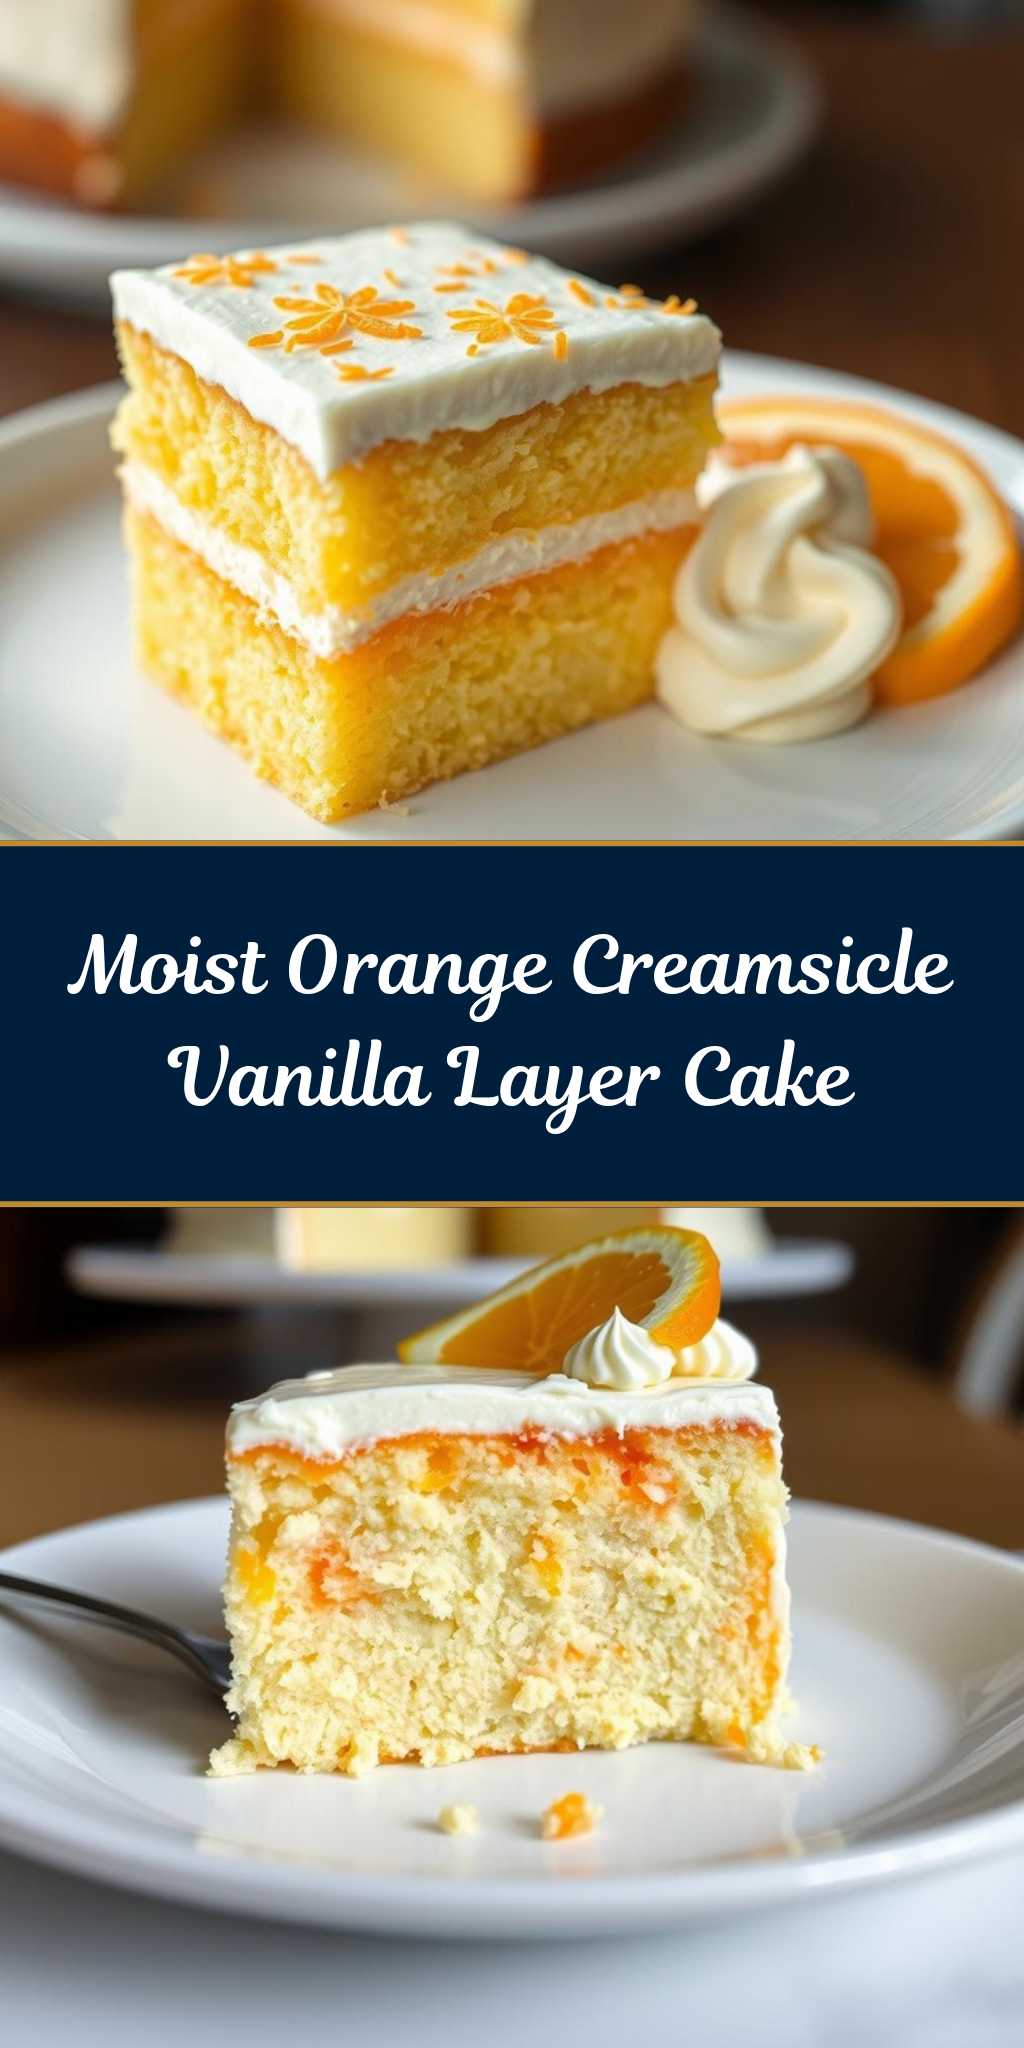
Imagine a moist and flavorful cake that captures the essence of a childhood favorite – the orange creamsicle. This Orange Creamsicle Cake is a creative twist on traditional desserts, combining the brightness of orange with the richness of cream in a way that’s both familiar and exciting. The best part? It’s made with everyday ingredients and is surprisingly easy to prepare, making it perfect for both novice bakers and seasoned pros looking to impress their friends and family with minimal effort. Whether you’re celebrating a special occasion or just want to brighten up a weeknight dinner, this cake is sure to delight with its vibrant flavors and textures.
Why This Works
- Flavor balance and ingredient accessibility: The cake’s success lies in its well-balanced flavors, achieved through the combination of orange zest, orange juice, and a hint of vanilla, all of which are readily available in most supermarkets.
- Ease of preparation: Despite its impressive appearance and flavor profile, the cake is straightforward to make, requiring basic mixing and baking skills.
- Impressive results with minimal effort: The end result is a visually appealing and deliciously moist cake that belies the simplicity of its preparation, making it an ideal choice for those looking to make a statement without spending hours in the kitchen.
Key Ingredients
The Orange Creamsicle Cake relies on a few key ingredients to achieve its distinctive flavor and texture. These include high-quality all-purpose flour as the base, granulated sugar for sweetness, unsalted butter for moisture and richness, large eggs for structure, freshly squeezed orange juice and zest for the orange flavor, vanilla extract for depth, and buttermilk to ensure the cake stays moist. For the cream cheese frosting, you’ll need cream cheese, unsalted butter, vanilla extract, and powdered sugar. Practical substitutions can be made for some ingredients, such as using regular milk with a splash of white vinegar as a substitute for buttermilk, but using high-quality and fresh ingredients whenever possible will yield the best results.
Instructions
- Step 1: Begin by preheating your oven to 350°F (180°C). Prepare two 9-inch round cake pans by greasing them and lining the bottoms with parchment paper. In a medium bowl, whisk together flour, sugar, baking powder, and salt. In a large bowl, using an electric mixer, beat the butter until creamy, then add eggs one at a time, beating well after each addition. Beat in the orange zest and vanilla extract.
- Step 2: With the mixer on low speed, gradually add the flour mixture to the wet ingredients in three parts, alternating with the orange juice, beginning and ending with the flour mixture. Beat just until combined. Divide the batter evenly between the prepared pans and smooth the tops.
- Step 3: Bake for 30-35 minutes or until a toothpick inserted into the center comes out clean. Let the cakes cool in the pans for 10 minutes, then transfer them to a wire rack to cool completely. For the frosting, beat the cream cheese and butter until smooth, then add the vanilla extract and gradually add the powdered sugar, beating until smooth and creamy.
- Step 4: Once the cakes are completely cool, place one layer on a serving plate and spread a thick layer of frosting on top. Place the second layer on top and frost the entire cake with the remaining frosting. Decorate as desired, perhaps with additional orange zest or sliced oranges.
Handy Tips
- To ensure the cake is moist, don’t overmix the batter, and make sure to not overbake. A toothpick inserted into the center should come out clean, but the cake should still feel slightly tender to the touch.
- For a more intense orange flavor, use blood oranges if they’re in season, or add a bit of orange extract to the batter and frosting.
- When making the frosting, soften the cream cheese and butter to room temperature for easier mixing and a smoother consistency.
Heat Control
Heat control is crucial when baking the cake. The ideal temperature is 350°F (180°C), and the cakes should bake for 30-35 minutes. Keep an eye on them after 25 minutes, as oven temperatures can vary. The cakes are done when they’re golden brown, springy to the touch, and a toothpick inserted into the center of each cake comes out clean. Avoid opening the oven door too frequently, as this can cause the cakes to sink.
Crunch Factor
This cake is designed to be moist and tender, rather than crunchy. To achieve this texture, it’s essential to not overbake and to use the right balance of ingredients, particularly the buttermilk and unsalted butter, which contribute to the cake’s moisture. If you prefer a bit of crunch, consider adding some chopped nuts or orange zest to the batter or using them as a topping for the frosting.
Pro Kitchen Tricks
- To ensure the cakes release easily from the pans, make sure to grease them properly and line the bottoms with parchment paper. Letting the cakes cool in the pans for a few minutes before transferring them to a wire rack also helps prevent them from breaking apart.
- For a professional finish, chill the cake in the refrigerator for about 10 minutes before serving to set the frosting, making it easier to slice and serve cleanly.
- Consider making the components of the cake (the cake itself and the frosting) ahead of time and assembling just before serving for maximum freshness and flavor.
Storage Tips
- The cake can be stored at room temperature for up to 3 days, wrapped tightly in plastic wrap or aluminum foil. For longer storage, it can be refrigerated for up to 5 days or frozen for up to 2 months. When freezing, it’s best to freeze the layers separately before frosting for easier thawing and assembly.
- When reheating, let the cake come to room temperature or gently warm it in the microwave or oven. Avoid overheating, as this can cause the frosting to melt or the cake to dry out.
- For the best shelf life, keep the cake away from direct sunlight and heat sources. If you’re planning to serve the cake over several days, consider frosting only the amount you plan to serve each day to keep the frosting fresh.
Gift Packaging Ideas
This cake makes a wonderful gift, especially for birthdays, holidays, or as a welcome gift for new neighbors. Consider packaging the cake in a decorative cake box or wrapping it tightly in plastic wrap and then in a colorful towel or gift bag. You can also add a personal touch by including a handwritten note or a small bag of orange candies on top. For a more rustic look, place the cake on a wooden board or a decorative plate and wrap it in twine or ribbon.
Flavor Variations
- Different spices: Add a pinch of cinnamon, nutmeg, or cardamom to the batter for a unique twist on the traditional orange flavor.
- Creative toppings: Instead of the traditional cream cheese frosting, top the cake with a lightly sweetened whipped cream, a drizzle of chocolate glaze, or a sprinkle of powdered sugar and chopped nuts.
- Ingredient swaps: For a gluten-free version, substitute the all-purpose flour with a gluten-free flour blend. You can also use almond milk or another non-dairy milk in place of buttermilk for a dairy-free option.
Troubleshooting
- Texture problems: If the cake turns out too dense, it may be due to overmixing the batter. If it’s too dry, it could be overbaked. Adjust your mixing and baking times accordingly for the next attempt.
- Ingredient replacements: If you’re missing an ingredient, consider substitutes. For example, if you don’t have buttermilk, you can make a substitute by mixing milk with white vinegar or lemon juice and letting it sit for a few minutes.
- Over/undercooking signs: Keep an eye on the cakes while they’re baking. If they’re browning too quickly, cover the tops with foil. If they seem undercooked, bake for a few minutes longer and check again.
FAQs
- Can I freeze it? Yes, the cake can be frozen for up to 2 months. It’s best to freeze the layers separately before frosting for easier thawing and assembly.
- Is it gluten-free? The original recipe is not gluten-free, but you can make a gluten-free version by substituting the all-purpose flour with a gluten-free flour blend.
- Can I double the recipe? Yes, you can double the recipe to make a larger cake. Just keep in mind that you’ll need to adjust the baking time accordingly, likely adding 10-15 minutes to the original baking time.
Conclusion
The Orange Creamsicle Cake is a delightful dessert that brings a burst of sunshine to any table. With its accessible ingredients, straightforward preparation, and impressive results, it’s perfect for bakers of all levels. Feel free to experiment with the recipe, trying out different flavor variations or substitutions to make it your own. Whether you’re a seasoned baker or just starting out, this cake is sure to become a favorite, and its ease of preparation makes it an excellent choice for sharing with friends and family. So go ahead, get baking, and enjoy the joy of creating something truly special!